Showing posts with label glass. Show all posts

Wednesday, 23 April 2014

Handmade Glass Lace Bobbins

I answered a desperate call over on the UK Lampwork forum 'Frit Happens' a week or so ago for 'help, can anybody here make glass lace bobbins?' After a quick google images to remind me what a lace bobbin looks like, I cautiously answered 'maybe, possibly.' I know, it's a cop-out answer but I've learnt the hard way not to commit myself to making something before I've tried - some of the simplest looking things turn out to be the hardest. I know some people run towards commissions, I tend to run away!

After a few emails with the lady who wants them I had a go at a few designs since the kiln was already on and hot! It was unusal trying to match them to an existing design which was hollow, I made these in solid glass which I'm more comfortable with, plus I think it gives them a nicer weight. Sizing was tricky, as she needed a set of ten, so I remembered a bit from my class with Jennifer Umphress where she showed how she used simple cardboard templates to make some of her large complex glass frames, and a permanent marker to size the glass. I ended up making a few more than planned, altering the existing design to make it more my own style, plus simplifing parts of the design to make it easier to keep them straight when making.

Test Glass Lace Making Bobbins
The customer, luckily, liked what I'd come up with, so asked me to make the ten. I did a bakers/glass makers dozen which was a good job as despite the template the sizes varied a little more than I wanted. I'm guessing getting too closed to the template and lightly charring it probably didn't help much in that regard!

They were so different to the type of glass I normally make they were surprisingly therapeutic to make. I don't know if I'll make many more, it has to be a hard-head business decision of having enough demand, but I can already see scope for ways I can make really special and unusal ones. 

The finished Glass Lace Bobbins
I'll probably make a more robust template if I make some more!


Thursday, 12 September 2013

Crack in the World

The world cracked from side to side..... and around the middle, across the top, and everywhere else!
The terrible blog title comes from a 1964 sci-fi disaster movie, 'Crack In The World', but in this case it should be millions of cracks as I struggle to get some little world earrings made. Producing them is turning into a disaster movie of their own!

I've been wanting to get some of the glass that makes such lovely cloudy effects for while now, and about six weeks ago I ordered about 3/4lb of this precious glass that hardly anyone seems to stock from a European stockist. And yes, that's in old school pounds weight, as glass producers still use imperial measurements as if they are sweet-shops (which, for anyone who works with glass, they are really!)

So I waited, and waited, and waited a bit more. Without going too much into the sordid details after several weeks, a lack of communication from the supplier (which would have smoothed things considerably) I eventually had to take it to a paypal dispute to get my money back. I got the refund, but not the glass I really needed.

So, now it was an order into an American stockist, which turned out to be super fast. They recommended using DHL for a few extra dollars, and considering the delays I'd already had I figured it was better to have the glass as quickly as possible. The last order I'd had from The States came from USPS (US Postal Service) was still moving around in the USA in the first three days, this delivery was picked up from the USA warehouse at 4pm Wednesday afternoon (their time) and on my door step before noon on Friday! Amazing, even more considering the USA is half a day ahead of us too, so they lost time flying it here!

So, kiln on, 23ct gold leaf ready, and I start making worlds. Or rather, I don't. This batch seemed to be reluctant to make the nice cloudy effects, I made a good 20-30 or so to see how they came out, and switched to another type I had that doesn't always make such nice clouds. I expect a few to crack, normally they are straight in half, and the second batch were mostly fine, but the new glass I'd waited so long for was a disaster! As you can see from the photo's, they have some severe incompatibility cracks, normally caused by mixing two glasses with different expansion rates together (COE) which may be the clear I normally use. It's always been fine in the past, and worked with the other glass fine. I have tried emailing customer service of the factory, but they don't seem interested in answering their emails to tell me if they've had anyone else have problems with this batch.

So this means that little worlds are going to be delayed even longer now, whilst I figure this out, or try to get another brand of glass to perform the same tricks I could get out of this one. I've even been giving serious thought to making my own, it'll probably be quicker to get that way! I am experimenting with some new world designs though, so watch this space.

In the meantime, and on a more positive note, I am now finally getting my Etsy shop refilled. I've been posting on Facebook to let people know, although I've been doing so much I'm worried all my Facebook followers are going to start thinking I'm spamming them! There are lots of new pendants, marbles, a few pens and pins, although earrings may be in short supply for a few more weeks, however when there are they may be some more unusual designs, so keep an eye on my status!


Bah! A days work and loads of gold leaf wasted :-(

Monday, 15 July 2013

Green Man Mask continued

I've taken the annealed mask out of the kiln and started work on adding more leaves and details. So far I've learnt;

Getting quite far along, still needs a few more hours yet
1) I need to think more about my work flow.
     I didn't really expect this first attempt to go so well, and jumped around the sculpture a little too much. This has left some areas under more stress as some leaves pull on others, and when I start heating sometimes this stress has caused parts further away to snap. There was quite a lot of re-joining and tweaking as I went back over areas, even just as I finished one of the first leaves came away that'll need re attaching.
    This time I went a little slower, as I added each new leaf I took time to make sure it was well joined, then while it was still hot (and the new join a little flexible still) joined it anywhere else it was touching the main structure to ensure it has at least two firm hold points, then re-heated the first joins just to make sure. I think 'just to make sure' should be the motto for doing this sort of work!

2) Nice work for hot weather.
      I do really need to get more pendants and big marbles made for the next Expo (yes I know it's months away, but foolishly I did book both London and Birmingham which are only separated by a few weeks). It's not too bad until the afternoon when the sun swings around, and the kiln starts getting hotter. This makes a nice change, and as I only need one wheezy old oxycon and the extractor hood on it makes for quite a quite and chilled out working.

3) Tricky to light, ok once lit
      Talking of old oxycons, it can be a bit tricky to get the mini torch to light and stay lit to start with. It might be because it takes quite a while to get all the air out of the oxygen and propane lines, once it has though it seems (mostly) ok so long as I don't have to turn it back off and on again! This is where a stand would be really helpful, if it allowed it to stay lit when needing both hands free.

4) Tidy that workbench
      Actually, I can't really see that happening, I even get around not needing to tidy it when working 104 glass by putting a board over the top of the debris! A separate little work area, with really, really good light would be ideal though, maybe that's a little higher too.

5) More plaster, less filler
      This poor face cast is starting to look like a bit of a burns victim, or something sort of Evil living-dead-doll from an Asian Horror film! The modroc is charring when the surface gets knocked or flakes off, so a thicker plaster/quartz layer might be better. Maybe also use chicken wire for strengthening instead. I mostly used modroc originally because I happened to have a big unused bag, and it makes quite light casts.
Charred and battered cast

6) Stay calm! Make good support underwear and it can be fixed!
      Hard to do when you heat up one area and another goes 'crack,' but that really probably comes down to the initial problems with not making some of the first joins as well as I should have or putting others under too much stress. Having to go back and re attach them has probably made the whole sculpture stronger and better made though. Next time I'll have to think more carefully about the best way of putting down those first leaves that become the scaffold for the rest of the sculpture.

7) Make more leaves
     This uses a huge amount of leaves, which is ok as I wanted to define the shape just in leaves anyway, but I never seem to make enough. When I've looked at Green Man pictures and original church stone sculptures they make most of the face with very few leaves. Sometimes it's one per face area (i.e. one of each cheek, one for the nose) and then stretch them out to make the shape. I wanted these green faces to be more like you might see them, when in a glimpse out of the corner of your eye the overall shape of the branches and leaves in the trees suggest a face, but then when you look it's gone. Or is that just me?

All in all this has been an interesting project, although it's not finished the next questions are 'do I make another in coloured glass,' and 'do I leave clear or sandblast it to a frosted finish?' And if I did frost it, it then leaves another decision, to then leave it as it is or paint it which leaves a nice matt finish? Mind you, as I don't have an airbrush/sandblaster yet it's probably not really a relevant set of questions!

In other news I might only be at Greenwich this Sunday (or not at all, I'm not sure if I can make it yet) so I am hoping to get some more marbles listed into my Etsy shop this week. As usual I'll give a heads up on Facebook to let you know when I start getting them listed.

Thursday, 11 July 2013

New Toy & Green Man/Woman Sculpture

It's been a bit of catch up since the last Expo and class, mostly I've been getting my head down and making new pendants and marbles for the stall. Hopefully they'll be some new marbles trickling through into my Etsy shop again in the next few weeks as well.

However I still want to try and make time to keep practising and improving my sculptural techniques. For a while I've quite fancied a hand torch, something that can go to really fine pin-point flame to tweak and work on details. Of course I couldn't quite justify the expense, it's not just the torch but all the new pipes and connectors too, plus I couldn't decide which one would be best for me. After chatting about hand torches during the course, and then seeing a cool photo of an American artist standing before a three foot sculpture he was assembling with a hand torch, I looked a little harder and came up with a Smiths Mini Torch at a bargain price.

New Little Torch
Although really made for metal work, it's quite popular with some glass artists. Although the flame really is tiny, it's nice and compact, has a tight hot flame, and best of all comes with it's own light and small hoses already attached. The hoses were the clincher, not only did it save an extra expense of new hoses, I didn't fancy having to hold a torch being dragged down by the normal heavy propane hoses.

Work in Progress, glass leaves being added using a plaster former
It's taken a few weeks now before I've had time to play with it though, apart from playing catch up I'm just confirming a very large commission which will keep me busy for weeks (holding breath and touching wood that it comes off, more on that when it's all confirmed!) However there has been an idea that's been kicking around in my head for a while, and this seemed the ideal tool for the job!

These are some 'work in progress' pictures, of a Green Woman mask that I've been making using the little torch to assemble the leaves which I made using my Lynx torch.
Top view of the mask removed from the former, with a leaf beside it

Off the former, this needs to be annealed before I carry on. One of the 'blank' leaves loose beside it
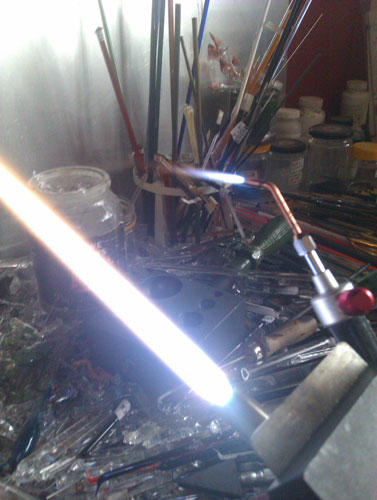
Little torch with it's tiny flame next to my Lynx running a fairy small flame

Before starting on this I've been wondering how to put the leaves together to make a good 3D shape. I figured a former would be the way to go, but I certainly couldn't afford a custom graphite shape in this size. Bellow is a quick run down on how I put this together, using plaster and mod-roc (basically bandages impregnated with plaster-of-paris, which many model shops stock for making hills and mountains on train sets etc.) For the mould I used the packaging from a paint your own mask kit from my local 99p shop! I was going to use the mask, but the plastic blister pack it came in was ideal as I didn't have to plug up the eyes and mouth cut outs, and it was waterproof!

Mask mould, I left the mask underneath to add some support and strength to the mould
This is my first real go with the torch, and it's quite a liberating way of working, although I could really do with a safe stand where I can leave it when lit if I need both hands free. It's a bit temperamental to light and keep lit until the gases have settled down. I found that I can even use a thin stringer to help 'weld' or 'solder' two parts together, and that if I get really close it's fierce enough to even 'push' the glass. I certainly need a bit more practise with it, maybe once I get time to finish this mask off I'll have a go at another once, with coloured leaves this time. It certainly opens up some interesting ideas and new ways of working.


Bellow is a quick run down of how I made the plaster blank, for anyone who wants to try something similar. Do use the torch on this at your own risk though, this is an experimental technique, and the plaster and modroc WILL get burnt as you work!
 
First layer, I used plaster and quartz (equal parts) which is a formula usually used for making kiln casting moulds. I hoped it would provide better heat tolerance for the 'working area' of the cast

Mod-roc, cut into strips and rough squares. Just pass this through a tray of water to moisten and then slap it on!
After adding some more plaster I started building up the sides with modroc and re-enforcing the main part of the cast with the modroc


Add more plaster before the last has set in the hope it all sticks together well!


Alternating now with layers of plaster and modroc, this adds both lightness and some structural strength


It's really easy to smooth out the modroc with a fingertip, be careful not to get it too damp though

Top up to the top, and smooth over so it will lie flat when de-moulded. It's a working cast and this bit isn't going to be seen so no need to make too much of a fuss of neatness.


Broken chin! I made the quartz/plaster layer a bit too thin, and then didn't push the modroc down enough so had a void under the chin which then flaked off. You learn by mistakes!
The finished cast. Now leave to dry, I left this near (but not on) my kiln for about two weeks to make sure it was fully dried.


Monday, 29 April 2013

Exhibition!!!

The exciting news is that I have some of my Alien Specimens in an exhibition, starting on Friday! The collection is entitled 'Glass' and features work from 30 different glass artists at the Cuploa Gallery in Sheffield from 3rd May to 16th June.

cupolagallery.com

This is quite a major show, it's been quite a surprise to see myself (and a picture of one of the Aliens) featured in press releases and emails from other mailing lists I'm on of upcoming exhibitions. I really wanted to go up for the opening night, but I just don't think I can make it as I only found out I was including a short time ago (thanks to some lost emails) and it seems all the trains and hotels rooms in Sheffield seem booked that weekend. This was by selection only, so I was delighted to hear I'd been chosen!

 One lobster didn't make it, thanks to the post office, and arrived upside down in a box clearly marked 'this way up,' one of the gallery directors told me he saw the driver offloading it, and was surprised that only one was broken. Not as bad as one artist though, for whom every item he sent arrived smashed. However the lobster I know can be rebuilt, and will give me the excuse to make some tweaks to it that I wanted to make.

This does mean I won't have very many aliens to take to the MCM Expo in London, but space is limited there this year, and hopefully the ones in Sheffield will now find new homes, then I can use the proceeds of their 're-homing' to fund making some more new and exciting ones!

Wednesday, 19 September 2012

Tiny Marbles, Big Horizons

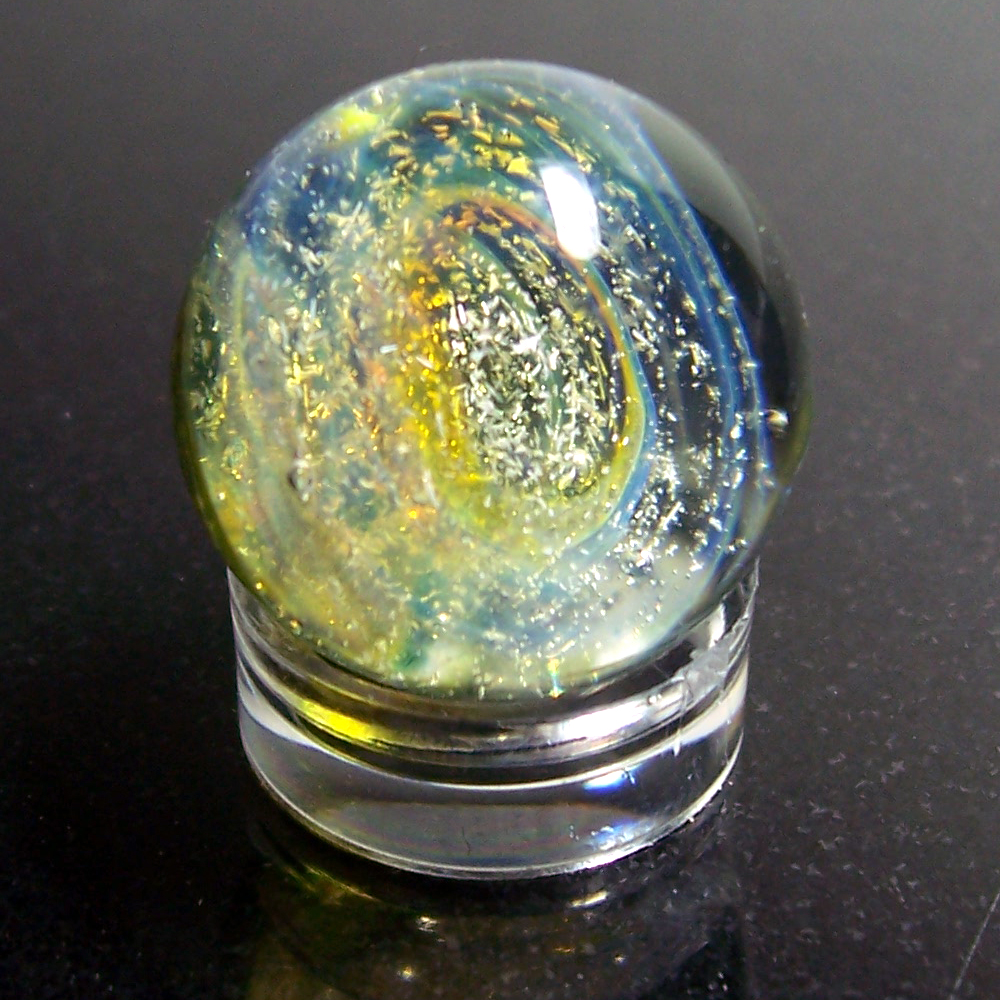
In the midst of getting my Etsy shop back and alive with new glass in it, I've had a lot of interest in very small galaxy marbles. These days I try to avoid making really big or really little marbles; it doesn't matter how big I make a marble I always get people asking if I can make them even bigger. I not sure if they even want to buy them, I think people just want to see football sized marbles! I used to try and pump them up as much as I could, often loosing some of the nice optical illusions and depth because I pushed them too far. Not to mention the hours twirling a hot heavy marble trying to get it into shape!

I've also try to avoid doing small ones, unless it's a quick test of a new colour or technique, when they start getting under about 20mm they become really tricky to hold and shape well. And to be blunt, despite the work involved, because of the small size people expect them to be sold for pennies. So these days I try to go for a comfortable balance between sizes, going often for the size the marble wants to be.

Then about a month ago I had an interesting enquiry from a chap who was re-creating the 'Men In Black' Orion's Belt prop. For those few people who haven't seen the movie, it's a little metal pendant that hangs from a cat's (a cat called Orion) collar, inside which is a little marble which contains an entire miniature galaxy. Well, it is a sci-fi/fantasy film!

I've had a few requests like this in the past, but what has made this different is that he's been using 3D printing techniques to produce it. As yet I've not seen the kit or bits, but I've had several enquires asking for marbles 18mm or smaller!

Setting to work to make some I soon realised why I try not to work at this scale, to start with I couldn't make anything smaller than 20mm, but a few more fails and I was starting to get the hang of the smaller ones. The next problem has been trying to get the detail into them. Many of the colours I use don't work when thinned down this small. Some of the colours just vanished, others just refused to play. I had this problem before with opaque reds in flower marbles which go from vibrant colour to a mud red when they thin out. Even the dichoric glass became a problem as it's really a very thin metal coating on sheets of 3-5mm glass. This needs to have another layer of glass locked over it, sometimes 2 or 3 layers in a sandwich, so suddenly there is 6-10mm of glass. It doesn't sound much, but throw in backing colours that add up to 3mm of glass at the base, and that it's only at the extreme equator of the marble that's the thickest part and suddenly every mm counts!

They are getting better, and more detailed, as I find tricks and colours that let me get around these problems. I don't think I am ever going to ever exactly copy the CGI created original, which I know it what the people making these props really want! In the meantime it's been quite interesting to make them at such extremes, and they've seemed to go down well with marble and glass collectors too.


 While all this has been going on I've had to drastically increase my shipping charges to USA & Canada, so that I can send parcels tracked and signed for, as I've had an awful run of packages not turning up. One of these was a commission for tiny marbles as well, which were even smaller and a nightmare to make. A compensation claim from Royal Mail can take months, (and I've had them wanting to prove how much it costs in materials to make) but it's letting down customers I hate most. I'm not using small envelopes anymore either, larger ones stops them being slipped into pockets, and gives more room for all the Post Office stickers! I once had a parcel from the USA with 14 USPS and PO stickers on it, so I've no idea how many end up on the ones I send to USA!

I'm going to try and add a few more, but I will have to stop adding to my Etsy shop for a while. Along with the run up to Xmas I have the MCM Expo at the end of October which I am frantically getting ready for, plus being at Greenwich! I may not be at Greenwich on some Sundays to give me chance to get ready, but I will try and make Saturdays (and possibly some Fridays too so I can avoid travelling to London during rail engineering works!)

Monday, 8 August 2011

New Kiln, New Horizons


The trip to Stourbridge gave me inspiration in unexpected
ways. It gave me a new appreciation of techniques like fusing, stained glass,
and casting, as well as ideas of ways I could incorporate some of my lampwork
into these varied disciplines, in fact I was brimming with ideas!


One serious restraint (along with cash for materials!) was
that my current kiln is ideal for annealing, which is what I bought it for, but
it won't go high enough for fusing, let alone casting, and new kilns aren't
cheap! However last week I saw this old kiln for sale, and got it for a song!


It's an old ceramics kiln, but has a controller which is
suitable for glass which needs greater control. However it was in a sorry
state, and the two elements were broken and hanging in pieces inside the kiln,
plus I didn't know if the controller was still ok, but took a punt at it anyway
from only seeing a few blurry pictures!


First job was the new element; a quick call into Kilncare Kilncare
whom I know by reputation as being first rate at sorting out elements. They'd
never made elements for this kiln, so I sent them the best remaining element,
which was in about three parts! I wasn't sure if there was more missing! As it
was they thought the element with it was too long for the rating, so made
elements to match what they felt it should be. I can't praise their service enough,
I posted the element out on Monday morning, and Thursday morning I had two new
elements in the post, and at a reasonable price too! So much quicker and easier
than trying to get 240v elements in from USA!


The next task was getting out the remains of the old
element, which turned out to be a much trickier job than I expected. I am not
sure what had happened to the kiln, but a lot of the coils had become firmly embedded
in the brick lining. Working away I also realised that much of it had also
melted into the bricks, leaving a metallic coating. I really needed to get that
off, as putting a new element on it would either short it out or cause hot
spots which might also damage the element. This took ages to do, and caused
more of the fragile and battered lining to come away. I had to turn and move
the kiln around to make sure I didn't miss any, a mirror came in use here
spotting bits of element that I originally missed.


When I finally got it all out, and hovered out the dust and
debris, I installed the new elements, which took no time at all and fitted
perfectly!

The only thing that worried me was that one of the channels in the
kiln-bricks had come away, so had to prop a bit of brick in case the element
started to sag when heated. I then fired it up, which a very slow rise to 200
degrees, which went fine, so did it on a full rapid fire to go up to 400degrees
C. Not a problem, it actually overshot the temperature, probably because it's
so well insulated. I am used to my fibre lined kiln, so was amazed how quickly
it got to temperature.


It still needs a little more work, the feet on the base are
bent, and I've ordered some kiln cement to sort out the damaged channel plus
some kiln furniture like props and boards, but now that I know it works I don't
mind spending a little more to get it up and ready for the next phase - melting
glass in it!


Monday, 25 July 2011

Stourbridge Busmans Holiday Continued


Continuing my day out at Stourbridge, here are some more pictures of the day out, starting with some more of resident glass blower, Charlotte, making a glass heart.

And organiser Julie Fountain of Lush lampwork, http://www.lushlampwork.co.uk/ who organised the day out! Here she is finding that wet newspaper is enough to stop your palm being burnt by hot glass!


After a look around at some of the wonderful glass at the cone, we stopped for a bite to eat in their tea room before heading to Broadfield House Glass museum.

We started with a look around some of the contemporary glass on sale in the shop, as well as a quick visit to resident glass blower Allister Malcolm
who was working on some glass restoration work making a new foot for an old vase - right down to putting a punty mark like the original.
After a look at the contemporary sea themed exhibition,
it was time to look around the collection, including the amazing world of cameo glass.

Stourbridge was where the way of re-creating the Portland vase was discovered. The Portland vase is a dark blue Roman vase with raised white relief, and for a long time no one was sure how it was made. It was found by putting a small cup of dark glass into a larger cup of white glass, then blowing it into a vase, a blank could be made. From there it was a long task of slowly engraving though the white glass to reveal the dark glass bellow, in the process creating some amazing cameos. At Broadfield they have some of the finest works, including three vases thought to be the best works ever produced using this method.
I have to say, they are breathtaking. The photos really don't do them justice, one has a figure with a cape where the layer is left so thin it's translucent, allowing some of the colour though.
Unbelievably the museum gets no real funding, and was nearly closed down recently because of local council cuts, despite having an international important collection.

I even managed to find a 'flip flop' in the collection! A customer at the stall told me how she played with these as a girl growing up in Stourbridge. At end of day glass makers might make 'friggers' - fun and silly obects such as glass canes and animals - and this was like a glass goblet with a hollow stem. Over the goblet end would be a very thin glass bubble, when blown into it would expand slightly, then fall back, making a 'flip, flop' noise!

Of course, I also found a 'little' valve!

From there we went to The Ruskin Glass centre, which has several studios for glass artists, and has both a strong educational element, along with helping glass artists to develop and launch their businesses. I wish I lived closer, I'd certainly be up for a unit there myself! We met quite a few of the artists there, although we were all starting to flag by this point! One of the most amazing ones we met was Terri-Louise Colledge.
Along with painting directly onto glass, she also engraves cameo glass with nothing more than a dentists drill, making stunning works of art. Again, the pictures really don't do them justice. One of these vases (the blue one with ivy leaves and a chameleon - the photo of the lizard side didn't come out!) took her seven weeks to cut away the white surface to make the design. She showed us a previous unfinished version, which two and half weeks into it chipped! It was on a critical part of the work, so she just started again! We all gasped at that, some pointing out we get annoyed if an hours work on a bead goes wrong, let alone weeks of work!

Outside we found a relaxing area, this wonderful pond,
where the waters trickles down the layers, spiralling around in each before running down into the next. Of course, it's all made of glass, each section is a screen of an old TV that has been slumped into shape in a kiln - I can't think of a better use of an old TV, or ever seeing a program more relaxing that this.


As everyone slipped away I popped off for a quick pizza with some of the lovely ladies from the forum, before getting back to the hotel and getting my boots off! It was an amazing day out, and left me wanting to try out a whole host of techniques. Mostly it has left me with loads of ideas and inspiration, and filling up notebooks of things to try and equipment to buy! I am already organising a workshop move around so I have more room to work! Many thanks go to Julie who organised this trip, and our tour guides who kept us amazing and interested thoughout a long and fruitful day!