Showing posts with label marble. Show all posts

Monday, 16 February 2015

New Little Worlds 2.0 are coming! And this time they're Alien!

New Alien little worlds being cleaned
Long time no blog, but as I've been taking a few extra weeks away from Covent Garden and Greenwich I've been catching up on a few things, including new ideas.

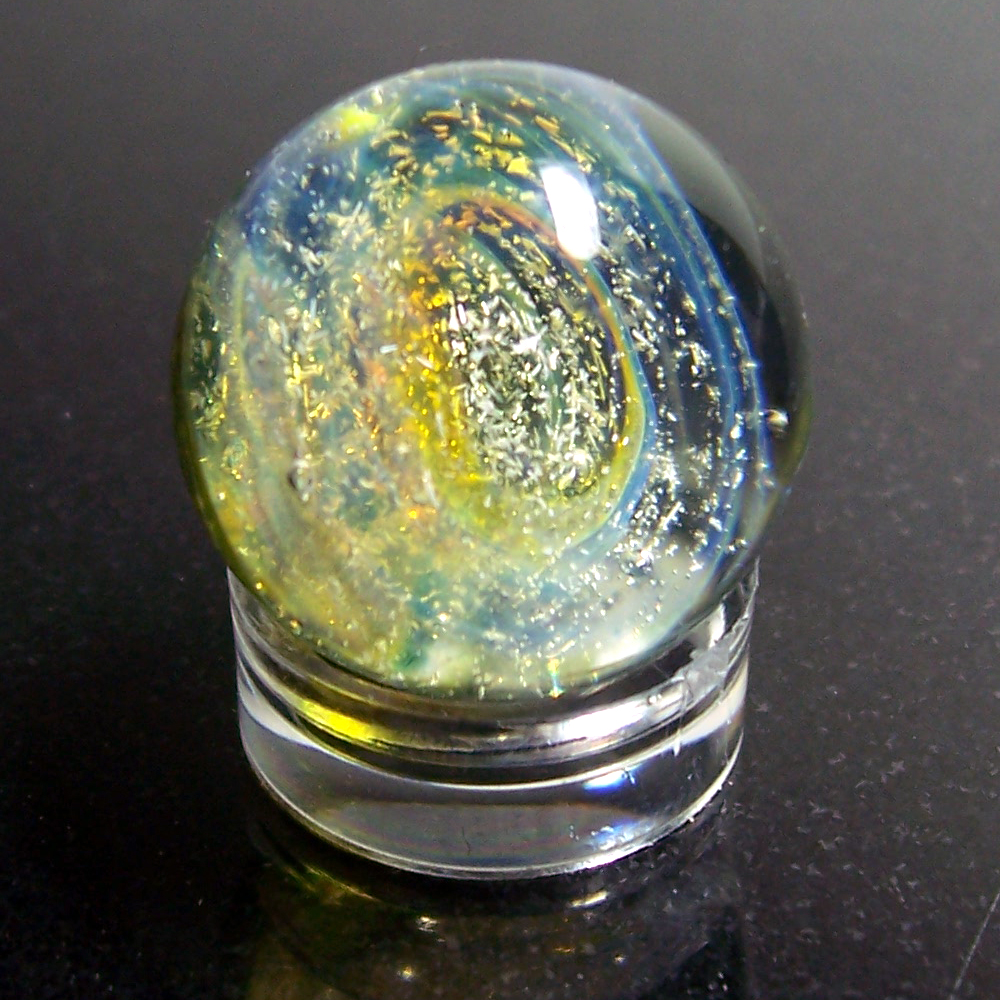
Tiny 'Men-in-Black' marble with penny for scale

Lately everything has been small, from smaller and smaller little galaxy marbles for people making the 'Men in Black' prop (or just who like small cute marbles!) to a return to finding a replacement for the little world earrings I used to make.

For those who didn't read about if previously crack-in-world,
Past Little Worlds that had problems with batches of cracking glass

or haven't seen them, I used to make some little tiny world earrings and pendants that had multiple layers of glass to produce clouds with 23ct gold leaf as islands and continents. They were getting more and more 'Earth like' and was about to explore a way of even adding poles to make them even more realistic when I ran into some problems with the glass I used for them.

It was pretty exotic stuff, and also needed lots of layers which didn't always play well with each other, I could have a failure rate of 20% some days, added to which it wasn't even the usual borosilicate glass that I use so have to clear the decks to stop cross-contamination of the different glasses. One of the types I used was becoming harder to get hold of, and after waiting a few months got a precious 1/2lb from the American factory that makes it. That's when disaster struck.

I always had a higher than wanted failure rate, but this last batch was terrible! Out of about 50 I think only 3 didn't crack in half before I even got them out of the kiln. Contacting the factory seem to also fall on deaf ears, and later talking to people 'in the know' found out they'd been having problems with this for a while. Even when I did get them to work the colours weren't nearly as good or as reliable, so I decided to start looking around for an alternative.

I made a few back in January of last year, and one or two looked quite interesting. One batch mostly went a boring bloody brown colour, but a few of these were an amazing multi-coloured medley of blues and greens giving them a real Neptune effect. Some stayed a little lighter red and whites to make passable Jupiters too. However time constraints and swapping from Greenwich to Covent Garden didn't give me time to explore them further - until now.

I'm still tweaking the formula, the effects are quite random, but revisiting them I'm getting some lovely colour combos. There is a failure rate, but so far it's around 5-10% which is much better if it says like that. There are the green and blue Neptunes, a few with purple whisps, brown and reds for Mars, and even the odd Jupiter too. Plus it's given me ideas for new glasses to try, one is producing a green-yellow that's quite weird, and even some slightly metallic textures too. As for Saturn, no, not doing that one yet!


Pairing them up is going to be quite a tricky one though, but hopefully I'll have some in the Etsy shop soon, and will be bringing them along to the MCM Expo in Birmingham on 21-22ns March at the NEC.

Thursday, 14 March 2013

Birmingham, here we come! (What have I forgotten to pack?)

Well, it's been months in the planning, and then lots of last minute running around and I am still wondering what I've forgotten! It's the Birmingham MCM Comic-con this weekend, and not only the first big event of the year for me, but also the first time I've ever done this show so am not sure what to expect! Hopefully it'll all be good things, and if it's anything like the London show it'll be full of amazing outfits and really lovely people to chat too! I've got some really nice new large marbles, plus new Aliens Specimen pictures too! OH (Other Half) is on hand again to help out on the stall, and in return I've promised her a trip(s) to some of Birmingham's legendary Balti houses! Yum! As you can see from this quick snap everything is packed (I hope), I guess I've either forgotten something as it feels like this time we've got less to take, I think I've got better at packing!

 I can't wait, although I am still wondering what I've forgotten.

Ah, just remembered..... clothes, toothbrush..... I haven't packed my suitcase yet!

Monday, 14 January 2013

Sawdust January


Well, as expected, January hasn't gone quite to plan, but then I never really expected it to! The original plan was, tidy and sort out the work-spaces, make lots of stuff, work on some new experimental stuff, and do lots with the huge glass order I placed two weeks before Xmas.
I've managed to find time to make a few new marbles too!

The one big hold at the moment is a big order of coloured borosilicate glass, which left the USA warehouse on the 12th January. By 14th it had got to 'forwarded to exporter,' where it seemed to remain until 2nd, when on-line tracking said 'arrived in UK.' I finally heard today, on month later, it might have actually got through customs and just requires me to pay up for tax and duty before I can git my mitts on it!

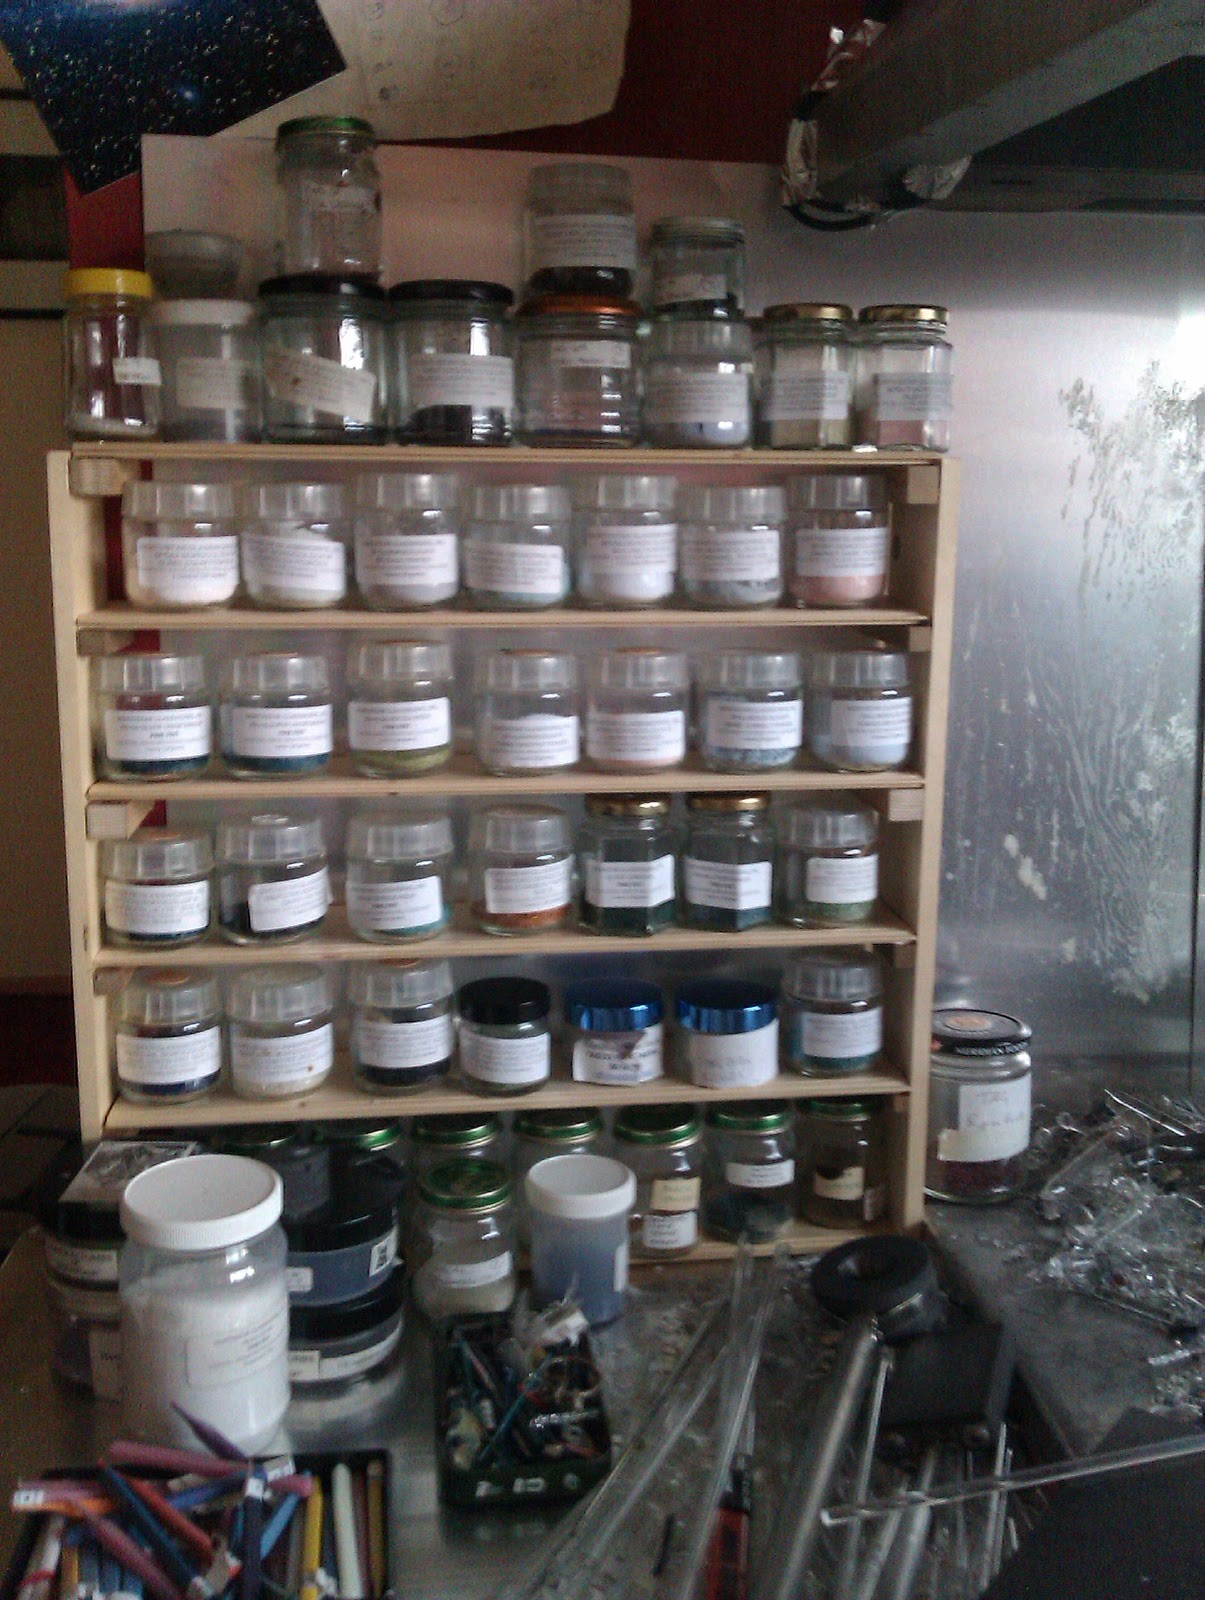
In the meantime I have got some small degree of organisation going in the workshop. First on the list was the ever expanding quantity of jars containing frit and powder. I have quite alot of old baby food jars with special lids for plant micro-propagation (long story!)  These are ideal as they are designed to be removed with one hand, so I can easily pop the lid off one that I need to use whilst the other hand is holding a rod of hot glass ready.
Before

What I obviously needed was some kind of spice rack. I'd previously tried a 'lazy Susan' rotating stand to hold them, but it just seemed to take up too much desk room. The result isn't very neat or well made, but it does the job! The before and after photos show how much tidier it looks already!

I didn't realise how much frit I'd acquired, some of them only have a little left, so I'll use those up and start transferring over to all having the same jars. Luckly the commercial small 4oz Northstar jars are about the same height too, as I know I'm going to end up with some more of those too!

After
The slightly bigger job was to sort out rod storage for the incoming 26lb box of glass (yes, I went a little crazy with the ordering, but I figured it would keep me going for quite a while.)  It also became a bigger job as the table that it was going to go under had a strengthening bar that was in the way. In the end I replaced the table completely, it was quite old and rickety. A pack of 40mm plastic pipe chopped up into lengths has made a nice neat 60 storage holes, but I've left space above as I'd like to extend this later on. I probably should have gone for slightly wider tubing, some of the colours may have to take up 2 slots for now, but the 50mm came in dull grey rather than white. At the bottom I've left wider sections to keep the more bulky supplies of tubing.

Apart from this the other major January job has been to get the dust off my Etsy shop. If you check my Facebook page regularly you may have noticed I've gone listing crazy, as I try to get lots of variety and a range of items back into my Etsy shop. I've been aware for a while now how little I manage to list, Greenwich seems to have taken up an awful lot of time and energy this past year, so I'm taking a few weekends off over the quieter months to try and catch myself up in advance - if that makes sense!

Wednesday, 19 September 2012

Tiny Marbles, Big Horizons

In the midst of getting my Etsy shop back and alive with new glass in it, I've had a lot of interest in very small galaxy marbles. These days I try to avoid making really big or really little marbles; it doesn't matter how big I make a marble I always get people asking if I can make them even bigger. I not sure if they even want to buy them, I think people just want to see football sized marbles! I used to try and pump them up as much as I could, often loosing some of the nice optical illusions and depth because I pushed them too far. Not to mention the hours twirling a hot heavy marble trying to get it into shape!

I've also try to avoid doing small ones, unless it's a quick test of a new colour or technique, when they start getting under about 20mm they become really tricky to hold and shape well. And to be blunt, despite the work involved, because of the small size people expect them to be sold for pennies. So these days I try to go for a comfortable balance between sizes, going often for the size the marble wants to be.

Then about a month ago I had an interesting enquiry from a chap who was re-creating the 'Men In Black' Orion's Belt prop. For those few people who haven't seen the movie, it's a little metal pendant that hangs from a cat's (a cat called Orion) collar, inside which is a little marble which contains an entire miniature galaxy. Well, it is a sci-fi/fantasy film!

I've had a few requests like this in the past, but what has made this different is that he's been using 3D printing techniques to produce it. As yet I've not seen the kit or bits, but I've had several enquires asking for marbles 18mm or smaller!

Setting to work to make some I soon realised why I try not to work at this scale, to start with I couldn't make anything smaller than 20mm, but a few more fails and I was starting to get the hang of the smaller ones. The next problem has been trying to get the detail into them. Many of the colours I use don't work when thinned down this small. Some of the colours just vanished, others just refused to play. I had this problem before with opaque reds in flower marbles which go from vibrant colour to a mud red when they thin out. Even the dichoric glass became a problem as it's really a very thin metal coating on sheets of 3-5mm glass. This needs to have another layer of glass locked over it, sometimes 2 or 3 layers in a sandwich, so suddenly there is 6-10mm of glass. It doesn't sound much, but throw in backing colours that add up to 3mm of glass at the base, and that it's only at the extreme equator of the marble that's the thickest part and suddenly every mm counts!

They are getting better, and more detailed, as I find tricks and colours that let me get around these problems. I don't think I am ever going to ever exactly copy the CGI created original, which I know it what the people making these props really want! In the meantime it's been quite interesting to make them at such extremes, and they've seemed to go down well with marble and glass collectors too.


 While all this has been going on I've had to drastically increase my shipping charges to USA & Canada, so that I can send parcels tracked and signed for, as I've had an awful run of packages not turning up. One of these was a commission for tiny marbles as well, which were even smaller and a nightmare to make. A compensation claim from Royal Mail can take months, (and I've had them wanting to prove how much it costs in materials to make) but it's letting down customers I hate most. I'm not using small envelopes anymore either, larger ones stops them being slipped into pockets, and gives more room for all the Post Office stickers! I once had a parcel from the USA with 14 USPS and PO stickers on it, so I've no idea how many end up on the ones I send to USA!

I'm going to try and add a few more, but I will have to stop adding to my Etsy shop for a while. Along with the run up to Xmas I have the MCM Expo at the end of October which I am frantically getting ready for, plus being at Greenwich! I may not be at Greenwich on some Sundays to give me chance to get ready, but I will try and make Saturdays (and possibly some Fridays too so I can avoid travelling to London during rail engineering works!)

Tuesday, 21 June 2011

In the Press & Big Marbles


I am seriously letting my on line life down lately, there just doesn't seem to be enough hours in the day, and I still never seem to get enough done! Although I do seem to empty the tea caddy quicket than I used to, so I suspect that I need to decrease my tea breaks and increase the time between them!

A few weeks ago I got a small mention in the Evening Standard. I had originally hoped they would be using a picture of one of my stoppers, as they had asked for high-res images, but sadly not and the mention was quite small - I even hot footed it to London to pick up a copy, so at £23 a ticket so rather an expensive clipping for five words! (One of those was 'and'!) I've highlighted the area in the picture.

Thanks to the weather and most of the DLR being closed things have been rather quiet at the market, so instead of making new pendants to refill stocks it has given me time to go back to some serious marble making. I've been trying to get the sizes up, at the moment I seem to be hitting a 'wall' at 40mm; although I am still playing with ideas to get up to the magic 50mm/2inch mark without having to invest in new equiment. Despite that I am really pleased with some of the new ones, especially a big 40mm galaxy spiral, which has a multicoloured galaxy floating in the centre. Even the back came out well, with lots of metallic blues!

Here are a few pictures of some of the new marbles, including some Lattachino vortex marbles. I have been approached about the possiablity of using one of my larger marbles as part of a public art statue, which is giving me even more reason to get some large marbles made!

Tuesday, 10 May 2011

Craft and Design Month - come play marbles!


As part of Craft & Design month, http://www.craftanddesignmonth.net I will be at Greenwich market this Friday to help promote the amazing range on offer there. This Friday 13th the focus is on stationary, toys and gifts, and as part of that I've dug out a large bag of my handmade marbles to play with!

Yes, come along that day and you can play with my marbles! Of course they might not be my best marbles, they will stay on the stand too oogle at, but I have a nice lot of seconds and test marbles that I don't mind being thrown around! I've even been featured in press releases for the market, which is amazing as I still feel like 'new boy' there! Hopefully there will be lots of interest, and I'll try to get some pictures too if I can! More info at http://www.craftanddesignmonth.net/events/?pc=SE10+9LS&r=4


The two Fridays after that there will also be events, on the 20th the focus will be jewellery and fashion, and on 27th May it will be interiors and home. I probably won't be there on those dates, but will be around on Saturdays and Sundays unless something major crops up, you can always check my Facebook page for any last minute news.

Saturday, 5 March 2011

Decisions, decisions


It's been another tough week, I normally am quite good at making decisions and then going and getting on with things, but not this week as I try to decide 'where next.'

I've been hoping to take a semi-permanent stall somewhere, but as with everything it's all about the location. I wasn't really happy with Spittlefields market, although the people are nice I did feel like my stall must have been touched by the plague as no one really wanted to come and look, and they don't run a Saturday market. Camden was 'interesting' but I was so tired out from doing Spittlefields (plus the nightmare tube breakdown at the start of the day) I had to cancel the Sunday.

I'd really like to be at a dedicated crafts and art market, this week I went to chat to the Greenwich market manager. I am due to do a trial day on Wednesday, but they have a 'no more jewellery' policy which means I'd might not be able to sell my pendants there. That might make it unviable, I am hoping they will see how unique and unusual they are and let them in. If not, I guess it'll probably back to Camden for now, but it's tough trying to sell hand made goods next to cheap imports. As I planned to be at a permanent location I've recklessly turned down a couple of one day fairs, and wondering about trying to book up some now just in case.

In the meantime I'm melting glass like a manic, and it's become a creative time for me again as I re-explore marbles. I've been experimenting with some new design ideas, again based on sci-fi and space themes. I've got no photos yet, they still need some baking to really bring the colours out, but I'll try to post some photos here or on my Facebook page within a few days. If anything fiddling around with stalls and making display equipment is really cutting into time I prefer to be creating. In the meantime I am trying to list at least one new thing a day in my Etsy and/or Folksy shop. I am using the Facebook page a lot more now when I do, so if you haven't found it yet it's on https://www.facebook.com/SteamPunkGlass

Tuesday, 26 October 2010

Razors, Marbles, and Beer


It's been an odd week, most of which I've spent trying to make as many razors as I can, only to run out of the heads! About ten minutes ago the postman turned up with some more (phew!) so I will get some more listed on Folksy soon! This had me going through my stash, and I am now reaching the end of the old two blade versions which aren't made anymore. I think I've got two more to list, then it'll be the end of a little era, and I'll only have the Mach3 heads which are a little more expensive. I still have a stash of shaving brushes, however they are limited in quantity too. I've found some replacements, but they don't have the nice silver finials and are a lot more expensive. At least I know have the firepower on my new torch that it's a little easier to make such large glass items, I just need to make them now!

After getting the new torch I realised I needed a bigger marble mould to help me when making marbles and cabochons. Almost everything I seem to do starts in some way as a marble, until reshaped or bits are added. In a fit of madness I ordered a new mould from USA, not realising how big it was! It's massive! The picture here shows it next to my original first graphite marble paddle, the largest hole on that is 25mm (1 inch) and this one has 6 holes on each side, going up to a whopping 1 3/4 inches! As only use the rim of the mould this (in theory) means I could make marbles up to 2inch or more although I've not managed to do anything bigger than 40mm yet that stayed in once piece!

Our local pub closed recently, only to reopen a week later under new management. It's good that it's still going, but the changes aren't good for us as my other half has lost her part time work there as barmaid. I am not sure how old the pub is but it's listed in 1841 census, but I don't know how much further it's history goes back. It's a real old world place, there are pictures in there from around 1900-1910 (at a guess looking at the outfits) when it was much smaller and next to what looks like a dirt track! We did manage to obtain a 'little' something from the landlady as she was clearing out. New pumps were put in a while back, and these older pumps are good solid brass (I guess they're 20 years old or more), rather than their new faux-brass replacements. There is talk when we eventually move of building a home mini-bar one day, and this will certainly help put Del-Boy Trotters home bar to shame! For now though, it will go into the loft until we decide when and where that will happen. It does give me time to find some more horse brasses and old beer pump badges to go with it though!

Thursday, 23 September 2010

Marble Video


One of my most asked about items is the flower marbles I make. Maybe because I know how they are made I don't really think about it, so I was surprised when people asked me questions which I thought odd, like 'do I buy them and put glass around them?' I even had some people asking if they are real flowers inside! Initially I was surprised at that one, the idea of putting molten glass over real flowers! Toasty! Then I realised what a compliment that was, that I'm getting them more life like!

I figured the best way was to show how it's done. The problem with that is one of these can take me 35-45 minutes, depending on how well it works and how complex they are. I decided time lapse was the best way, so I speeded up the action three times to make this little 12minute video.

My camera memory is a bit limited, so I had to cut making the coloured glass cane that makes the stripy flowers, and the first ten minutes. Also it has a bit of a tint as I put a spare pair of safety glasses in the front to remove the sodium flares the glass produces - a previous attempt was just lots of bright yellow glows!

I hope you enjoy it, I just wish I could work so fast normally!

Wednesday, 17 February 2010

Return to Galaxies


I’ve been beavering away on my galaxy marbles again. I stopped making them for a while as I wasn’t very happy how they were coming out, so went back to the drawing board and tried a couple of different techniques to form them. I am much happier with them now, and leading on from the complex cane techniques I’ve learnt a lot recently about ways of building up more complexity in the marble.

Wot more!?! Yes, I am still excited to find out how much I can pack into something just over an inch in diameter. I do like the idea, especially with these, that I can put a whole world – or even worlds! – into such a small space so the viewer has more things to discover.

If you go to one of the forgotten distant wings of The British Museum there is, (at least there was the last time I went there) a small display of items from the 1500-1600’s. Among them are what look like large boxwood pocket watches but inside they have the most amazing carved religious scenes. In a space less that an inch ½ across are dozens – yes dozens!- of figures clustering around a crucifixion scene, some of the spears soldiers are holding are no more than a splinter. How some medieval genus managed to carve these, probably with quite basic tools, inspires wonder and awe at their craftsmanship. I guess it’s seeing things like this that convinces me that even a marble or a bead can be a big enough canvas for any epic scene. One of the technical problems I’ve had with these marbles is down to the lack of heat I can get into the marble until I can afford a bigger torch. Looking at these is a reminder that I don’t need to make them huge to be full of interest.

On an exciting glass front I am awaiting a new shipment of glass colours from a factory sale in the USA. It’s rather battered my ‘big torch fund’ but it will mean some new colours and some glass I’ll have a decent usable quantity of. One or two I’ve been rationing because I’m down to a few stubs, so it will be great to go wild with some really exciting colours, including one of the sexist multi-coloured blues ever, and even two new reds!

In the meantime here are some pictures of one I’ve turned into a wine stopper – they are all the same marble but I am finding they really look different as I move them around which is exactly what I want, but makes a real headache of photographing them to show what they are like! This one is up at my folksy shop.

Edited as I've since found they are called 'prayer-nuts' and you can see a few on the British museum website, although they are more impressive in real life! http://www.britishmuseum.org/research/search_the_collection_database/search_results.aspx?orig=%2Fresearch%2Fsearch_the_collection_database.aspx&searchText=prayer-nut%2C&fromDate=&fromadbc=ad&toDate=&toadbc=ad&x=15&y=9


Wednesday, 27 January 2010

Going to MOO!

Many years ago I was stopped in the street and asked if I’d like to help product test some cakes and biscuits. Cake! I understand cake, and I like cake (although not ones with those crunchy sugar crystals on the top, cake should be soft and gooey and is sweet enough already without adding crunchy bits!) So I spend a couple of hours scoffing cake – cool!

So last week I answered a request from Moo, who make the lovely little mini-cards I send out with orders, give to people, hide in restaurant menus, use as a portable slide show and my other half uses to show people what I do when they say ‘uh, marbles? Why?’ followed (hopefully) by ‘oooo, I see!’ They wanted people to come and test a new product. I was a little surprised to be picked as I couldn’t bring a laptop, however they arranged a loan one, all I needed was to bring a usb with images.

I really didn’t know what I was going to be seeing when I got there, I guess I expected it to be a new printed product, but I was told I was going to be one of the first people in the world to see it! Despite having to use a mac-book for the first time, it all seemed to go quite smoothly. I’m not sure of the best way to describe what I was testing, it’s sort of a mini-display for images, like the sort of thing you see on windows vista where all the pictures flip through like a pack of cards standing up (very Alice in Wonderland!) Like their products it was quite slick, I’ve seen and used web-based services like this that have been less clear and thought out – not bad considering this was the testing phase. I’m not breaking any confidentiality clauses, they said it was ok to blog about it, and they are looking to launch it initially for business card makers first. My verdict, it was ok.

Oh dear, not ‘cool’ or ‘wow’ but ‘ok.’ It generates a like to a nice little animated gallery, which can be viewed from the Moo site only, but personally I can’t see it’s something that’s going to rock my world. I have a Flickr gallery already, which viewers can interact with and comment on, plus galleries on my website and even Facebook page. Maybe it will be the next big thing, time will tell. I was going to post the link here for you to see, but it seems not to work, so you’ll have to wait until it comes live! In the meantime here’s a non-moving picture of one of the new stoppers which I’ve popped into my Misi shop which I am going to try and list more in this year.

Tuesday, 19 January 2010

How Low Can I Go?


Occasionally I get asked if I can do something special or different in glass. Many are to revisit and remake old favourites, but some are for new twists on things I’ve already made. It’s always interesting to hear new ideas, and they often take me down paths I wouldn’t have expected to explore.

The ones that seem easy often turn out to be the most problematic! Recently I was asked if I could make a red flower in a marble. Now I don’t normally try to do specific flower, mine are more ‘impressions’ of a flower, but this seemed such a simple construction, I thought ‘No problem!’ How wrong I was!

After about the 9th marble, I finally got the shape to start working, about the 12th I think I pretty much nailed it. It just goes to show how Mother Nature is rather more clever than we think, and how complex simplicity is! I won’t tell you what the flower is, as this is for someone else’s special project. My next problem is trying to get the colour right, which again turns out harder than expected. I bought a sample pack of Northstar’s boro colours which I use as a palette of colours. There are about 110 or more colours, then added to that I have most of the TAG colours, some Northstar experimental colours, plus the odd bit of Borostik, Glass Alchemy and Momka colours! Basically anything I can get my hands on! Out off all these different makers and different reds I was surprised how so many of them turned the same dull colour in use. Further investigation found that I wasn’t the only one finding this, when thinned down all these opaque reds returned to a rather bland dull brick red. There are some rather sexy reds in transparent, but as yet I haven’t got them to work with an opaque base to make a good red. I shall persevere!

Then the other day I had a less promising question. Could I make vortex marbles smaller? About 9-14mm? I thought not, but tried anyway. Unsurprisingly the first attempts were blobs of glass that fell onto the pie tin I keep under my torch to catch wandering bits of hot glass. However I tried again the next day, running the torch at lower pressures, using the same techniques I’d use on a full sized one but with tiny 4mm glass rods. I was so surprised when it worked! I even managed to put some aventurine sparkles inside them, although they work quite well plain a this size too. The first one was about 15mm, but it didn’t take long to start getting them down to 10mm!

Having achieved what I set out to do, the obvious question popped into my head; how low could I go? I thought 9mm was as small as it could go before I started loosing the design. However I got one to 8.65mm (according to my digital callipers!) Then a touch under 8mm, then an insane one which should have been 6mm! I really hit the edge of what was possible with this one, I couldn’t get the bottom to polish off properly so it’s the only one with a ‘dented bottom!’ Also when I measured it I found it has squashed slightly where I’d held it in tweezers as I’d tried to finish it, so one side is 5.76mm the other is 6.06mm! The results are shown here, the 10.5mm green one is my favourite, although the photos don’t really do justice to them as my camera wasn’t happy with focusing this small either!
And yes, that is a 5p coin!!!

I will play with this some more soon, apart from my other half wanting a pair as ear studs, I want to see if I can do some of my other designs small to make a range of real glass micro-paperweights for Dolls houses. I need to clean up and simplify some of the designs first, but they are such fun to do I really can’t resist trying them out! I am hoping to get more workshop time soon, if I can do them without having to charge too much (it's quite labour intensive) then I will probably list them on Esty in the next few weeks.

Wednesday, 9 September 2009

New Toy

Well I finally have a new toy that I’ve been promising myself for ages! This is an infinite rim, multi-hole, graphite marble maker, straight from the US of A!

I should have actually had it last week, but the post office has been rather causing headaches, I seem to spend most of my time apologising to American customers for non-appearing orders. I am not sure how they can send me two parcels from the same post office 5 days apart? Never mind, I have it now!

I have yet to use it, but I can see it’s certainly best grade graphite. I don’t have too much problem from my current one, but have noticed on occasion the odd speck coming off and marking a marble. This one also has special conical holes which are meant to make shaping a little easier and smoother, and there is one big hole on the flip side too! With marble tools it's actually the edges of the rounds that are used, the marbles are rotated inside them to make them spherical, this special shape is supposed to make that easier.


I must admit I didn’t expect it to be so chunky though, feels like it’s made to last, even has a little spiral on the counterweight finial at the end!

It does seem though as soon as I treat myself to something I suddenly get unexpected bills. One of our cats, Merlin (the psychotic black & white) has reoccurring ulcers around his chin and mouth. Last night we found one was bleeding rather nastily so it was down to the vets with him. Apparently it was a simple case to cauterize it, but one was in a sensitive part of his mouth so needed a general anaesthetic for a 2 minute op! (I feel like he needs that to give him pills!) All went well, I pick up the little devil tomorrow, and sure he will be back to his mad psychotic ways very soon. What really worries me is the vet says we will have to open his mouth every week to check to see if they ever reoccur; so now as well as burns on my fingers it’ll be puncture wounds too!

Thursday, 27 August 2009

Birth of a Marble; Picture show

I’ve not a lot to report at the moment, but I did try to take a few one-handed pictures of a 'galaxy' spiral marble; although some steps aren't shown clearly as I needed both hands for those!


It’s not tidy, but ready to work! The black ‘thing’ is a graphite marble mould, the marble is rounded out partly in the flame and partly by rotating in a mould that is too small to fit it – only the rim is used. Weird, yes, but it seems to work!


2nd step, getting rod hot ready to add the spiral


Spiral is made! I couldn't show this step very well as I needed both hands!


Added some glass to make a nice, and hopefully interesting, base!


I've melted more glass off the fat 10mm rod to make the front and attached a thin 4-5mm rod to the back to hold it - very much a two handed job that! The thin rod is a 'cold seal' so can easily be removed, although sometimes it can remove itself thus the pie tin in case it falls!


This now takes a lot of time to melt and get the shape right, also getting rid of as many imperfections in the front to make a nice crystal clear lens. At the moment it's more of a 'bulge' shape.


Getting there! Front now rounding out nicely, the back rod will be switched to front and back again as I try to get all parts even and smooth, using the rim of the marble mould to try and tame it into shape where needed.


Still rounding! This one I've popped a Gilson Opal inside, which would be done before adding the lens glass.


As round as I can get it, the supporting thin punty rod will now be removed, any scar left given a quick work over to remove, then it's into the kiln for a very long soak to anneal.

Hope you enjoyed that, obviously there are alot more stages between that I couldn't show, but hopefully this give you a bit more idea about how it all comes together from a few sticks of glass to a little ball!


Monday, 3 August 2009

Opals !!!!

(New 30mm marble with opal, now on Etsy!)


Unlike ‘soft’ glass, working with borosilicate has some limitations of colours, ways of working, and what can be put inside. For a start buying it can be fraught with difficulties, I only know a few people using it in this county, and getting supplies is tricky. In the USA there are lots more people using it, which means more trade and it’s easier to get the more difficult items. Last week I had to launch a desperate plea on the Frit Happens website for one special effects rod rather than trying to put together an expensive import from the USA!

The USA have been using boro much longer than here, one of the amazing things discovered by some USA lampworkers that although many items can’t be used easily in borosilicate (gold and silver evaporate before the glass thinks of melting!) that one strange opal has the right properties for being encased in borosilicate (pyrex)

In France in 1974 Pierre Gilson was able to create the first synthetic opals. These weren’t bad imitations made with plastic and glass; they are physically and chemically opals, made by copying the extreme pressures and temperatures over very long periods (some can take 12-18months to form) that naturally make opals. It’s only under a microscope that they can be seen as different as they have no flaws like normal opals, so makes them stronger!

The best bit (for me!) is unlike natural formed opals they have no water content! Coupled with having same expansion rate as borosilicate it means they can be encased without cracking or exploding!

I bought a few some months ago, but as they still aren’t cheap it’s taken me a while to get the nerve up to try them out. I posted a picture on last weeks blog showing one; they make such amazing ethereal planets. I managed to get some tiny dot bubbled orbiting one which was a wonderful effect. I started on a second one I was just about to tidy the marble up and get rid of some of the extra bubbles & knocks when the gas ran out! Argh! I’m still debating whether to break it up for the opal, or sell it as a second as I can’t re-melt this one because the red glass in it might go a nasty colour if I do.
(My first Marble with a Gilson Opal!)

I have now made a very large 30mm marble (about 1 1/8 inch) with a lovely galaxy swirl, originally I was going to put the opal in the centre but it wanted to orbit on the arm which I think looks better as it breaks up the symmetry. Underneath I’ve done some lava-lamp effects with whispy yellow, green-yellow and blue glass, and a simple cobalt blue backing. It’s now in my Etsy shop, a little more expensive than some of my previous marbles, but it is rather special! I’ve really enjoyed working with these little treasures, and hope to include a few more as I really like the ethereal feel they give to my little landscapes, or should that be galaxy-scapes?