Showing posts with label make. Show all posts

Thursday, 11 July 2013

New Toy & Green Man/Woman Sculpture

It's been a bit of catch up since the last Expo and class, mostly I've been getting my head down and making new pendants and marbles for the stall. Hopefully they'll be some new marbles trickling through into my Etsy shop again in the next few weeks as well.

However I still want to try and make time to keep practising and improving my sculptural techniques. For a while I've quite fancied a hand torch, something that can go to really fine pin-point flame to tweak and work on details. Of course I couldn't quite justify the expense, it's not just the torch but all the new pipes and connectors too, plus I couldn't decide which one would be best for me. After chatting about hand torches during the course, and then seeing a cool photo of an American artist standing before a three foot sculpture he was assembling with a hand torch, I looked a little harder and came up with a Smiths Mini Torch at a bargain price.

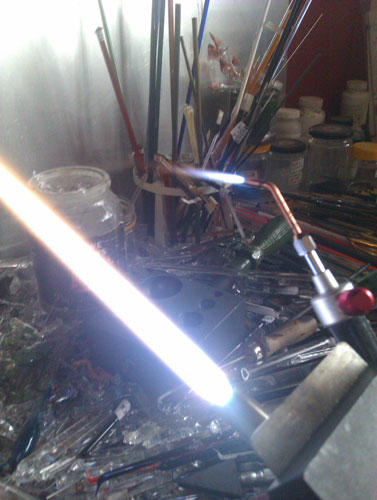
New Little Torch
Although really made for metal work, it's quite popular with some glass artists. Although the flame really is tiny, it's nice and compact, has a tight hot flame, and best of all comes with it's own light and small hoses already attached. The hoses were the clincher, not only did it save an extra expense of new hoses, I didn't fancy having to hold a torch being dragged down by the normal heavy propane hoses.

Work in Progress, glass leaves being added using a plaster former
It's taken a few weeks now before I've had time to play with it though, apart from playing catch up I'm just confirming a very large commission which will keep me busy for weeks (holding breath and touching wood that it comes off, more on that when it's all confirmed!) However there has been an idea that's been kicking around in my head for a while, and this seemed the ideal tool for the job!

These are some 'work in progress' pictures, of a Green Woman mask that I've been making using the little torch to assemble the leaves which I made using my Lynx torch.
Top view of the mask removed from the former, with a leaf beside it

Off the former, this needs to be annealed before I carry on. One of the 'blank' leaves loose beside it
Little torch with it's tiny flame next to my Lynx running a fairy small flame

Before starting on this I've been wondering how to put the leaves together to make a good 3D shape. I figured a former would be the way to go, but I certainly couldn't afford a custom graphite shape in this size. Bellow is a quick run down on how I put this together, using plaster and mod-roc (basically bandages impregnated with plaster-of-paris, which many model shops stock for making hills and mountains on train sets etc.) For the mould I used the packaging from a paint your own mask kit from my local 99p shop! I was going to use the mask, but the plastic blister pack it came in was ideal as I didn't have to plug up the eyes and mouth cut outs, and it was waterproof!

Mask mould, I left the mask underneath to add some support and strength to the mould
This is my first real go with the torch, and it's quite a liberating way of working, although I could really do with a safe stand where I can leave it when lit if I need both hands free. It's a bit temperamental to light and keep lit until the gases have settled down. I found that I can even use a thin stringer to help 'weld' or 'solder' two parts together, and that if I get really close it's fierce enough to even 'push' the glass. I certainly need a bit more practise with it, maybe once I get time to finish this mask off I'll have a go at another once, with coloured leaves this time. It certainly opens up some interesting ideas and new ways of working.


Bellow is a quick run down of how I made the plaster blank, for anyone who wants to try something similar. Do use the torch on this at your own risk though, this is an experimental technique, and the plaster and modroc WILL get burnt as you work!
 
First layer, I used plaster and quartz (equal parts) which is a formula usually used for making kiln casting moulds. I hoped it would provide better heat tolerance for the 'working area' of the cast

Mod-roc, cut into strips and rough squares. Just pass this through a tray of water to moisten and then slap it on!
After adding some more plaster I started building up the sides with modroc and re-enforcing the main part of the cast with the modroc


Add more plaster before the last has set in the hope it all sticks together well!


Alternating now with layers of plaster and modroc, this adds both lightness and some structural strength


It's really easy to smooth out the modroc with a fingertip, be careful not to get it too damp though

Top up to the top, and smooth over so it will lie flat when de-moulded. It's a working cast and this bit isn't going to be seen so no need to make too much of a fuss of neatness.


Broken chin! I made the quartz/plaster layer a bit too thin, and then didn't push the modroc down enough so had a void under the chin which then flaked off. You learn by mistakes!
The finished cast. Now leave to dry, I left this near (but not on) my kiln for about two weeks to make sure it was fully dried.


Monday, 14 January 2013

Sawdust January


Well, as expected, January hasn't gone quite to plan, but then I never really expected it to! The original plan was, tidy and sort out the work-spaces, make lots of stuff, work on some new experimental stuff, and do lots with the huge glass order I placed two weeks before Xmas.
I've managed to find time to make a few new marbles too!

The one big hold at the moment is a big order of coloured borosilicate glass, which left the USA warehouse on the 12th January. By 14th it had got to 'forwarded to exporter,' where it seemed to remain until 2nd, when on-line tracking said 'arrived in UK.' I finally heard today, on month later, it might have actually got through customs and just requires me to pay up for tax and duty before I can git my mitts on it!

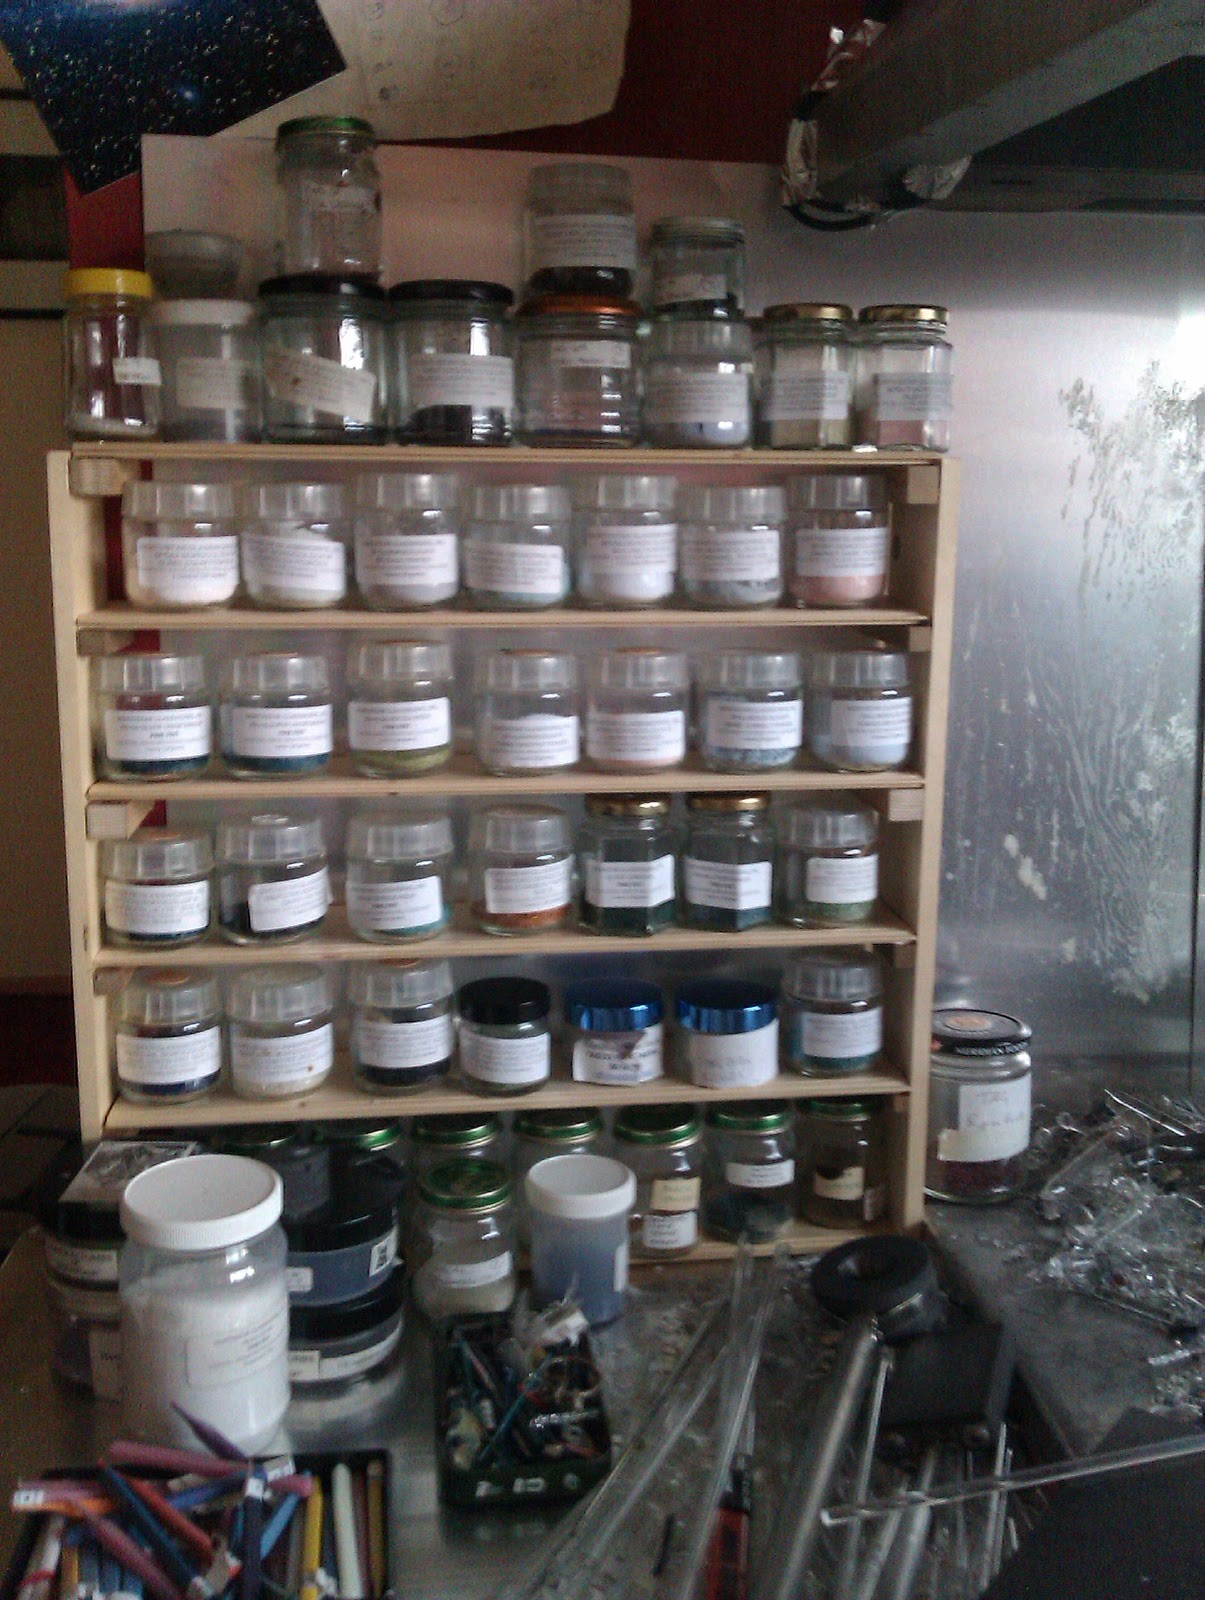
In the meantime I have got some small degree of organisation going in the workshop. First on the list was the ever expanding quantity of jars containing frit and powder. I have quite alot of old baby food jars with special lids for plant micro-propagation (long story!)  These are ideal as they are designed to be removed with one hand, so I can easily pop the lid off one that I need to use whilst the other hand is holding a rod of hot glass ready.
Before

What I obviously needed was some kind of spice rack. I'd previously tried a 'lazy Susan' rotating stand to hold them, but it just seemed to take up too much desk room. The result isn't very neat or well made, but it does the job! The before and after photos show how much tidier it looks already!

I didn't realise how much frit I'd acquired, some of them only have a little left, so I'll use those up and start transferring over to all having the same jars. Luckly the commercial small 4oz Northstar jars are about the same height too, as I know I'm going to end up with some more of those too!

After
The slightly bigger job was to sort out rod storage for the incoming 26lb box of glass (yes, I went a little crazy with the ordering, but I figured it would keep me going for quite a while.)  It also became a bigger job as the table that it was going to go under had a strengthening bar that was in the way. In the end I replaced the table completely, it was quite old and rickety. A pack of 40mm plastic pipe chopped up into lengths has made a nice neat 60 storage holes, but I've left space above as I'd like to extend this later on. I probably should have gone for slightly wider tubing, some of the colours may have to take up 2 slots for now, but the 50mm came in dull grey rather than white. At the bottom I've left wider sections to keep the more bulky supplies of tubing.

Apart from this the other major January job has been to get the dust off my Etsy shop. If you check my Facebook page regularly you may have noticed I've gone listing crazy, as I try to get lots of variety and a range of items back into my Etsy shop. I've been aware for a while now how little I manage to list, Greenwich seems to have taken up an awful lot of time and energy this past year, so I'm taking a few weekends off over the quieter months to try and catch myself up in advance - if that makes sense!

Tuesday, 18 August 2009

Building a Glass Carousel in front of the Telly


Sorry for the lack of posts lately, thanks to the dreaded credit crunch I seem to be doing more ‘dayjob’ work, more hours and less money! Grrr! Along with the dose of railway strikes I’ve had hardly anytime or energy to get onto forums or keep up to date with blogging etc, so apologies to all!

I’ve also spent way too much time playing around with new ideas and techniques, sadly most of them not going anywhere. I took a whole day to try and use soft glass, wow! I am so out of practise now. Although I didn’t really make anything worthwhile it did at least confirm to me that the place I am at the moment ‘in my head’ is making marbles and hard glass work such as implosion pendants, bead, etc. I have more ideas than time in the day at the moment for these, so soft glass and ‘normal’ beads are going to have to take a back seat for a little longer.

One thing I did manage to do this weekend, whilst slumped in front of Sunday all day re-runs of ‘Deep Space Nine’ was make a little glass carousel that I’ve been promising myself. Basically it’s two old wooden cable drums, one larger one was broken down into the discs and an old VCR motor glued between them to make a ‘lazy susan.’ I could have bought one, but this was free! Plus it re-uses old rubbish! I glued onto the second smalled drum on Friday night ready for the Sunday make!

The hidden base, two old cable drums and a nice motor from an old VCR as the bearing


The finished article loaded with glass ready to melt!

What took quite some time was making the template for the metal troughs that were to hang from the sides; I cut up some scrap card I had to try to get the shapes first, took a couple of tries and still didn’t quite get them right, but it was near enough. I had some very old printers metal sheet that I rescued from a clearout of an old print shop, excellent for the job too! So I marked and cut this out to the background of various Cardassian plots, took to the shed for a quick five minute hammer and fix, and job done!

In the eight sections I’ve put six inch rods I had from a Northstar sample pack – I use them as an artists colour palette so it’s really useful to have these at hand, some I only need a tiny dash of colour so they can go a long way, other workhorse colours I buy in packs of full rods instead. Even with over 100 6inch Northstar rods there was some spare space for other odd rods I have, and on the top goes some of my frit jars. Frit, for those that don’t know, if crushed glass chips graded by size. It used to be made by throwing hot glass into water where it crackled and fizzed, sounding like it was frying – thus frit which means fry in Italian apparently!