Showing posts with label workshop. Show all posts

Monday, 16 February 2015

New Little Worlds 2.0 are coming! And this time they're Alien!

New Alien little worlds being cleaned
Long time no blog, but as I've been taking a few extra weeks away from Covent Garden and Greenwich I've been catching up on a few things, including new ideas.

Tiny 'Men-in-Black' marble with penny for scale

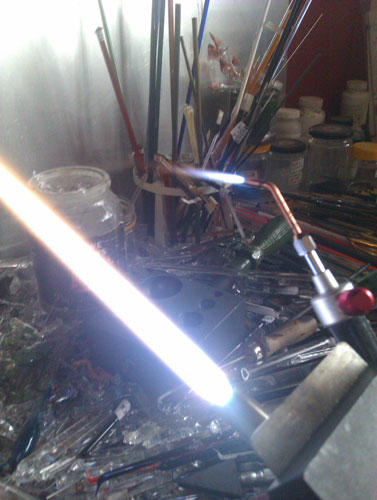
Lately everything has been small, from smaller and smaller little galaxy marbles for people making the 'Men in Black' prop (or just who like small cute marbles!) to a return to finding a replacement for the little world earrings I used to make.

For those who didn't read about if previously crack-in-world,
Past Little Worlds that had problems with batches of cracking glass

or haven't seen them, I used to make some little tiny world earrings and pendants that had multiple layers of glass to produce clouds with 23ct gold leaf as islands and continents. They were getting more and more 'Earth like' and was about to explore a way of even adding poles to make them even more realistic when I ran into some problems with the glass I used for them.

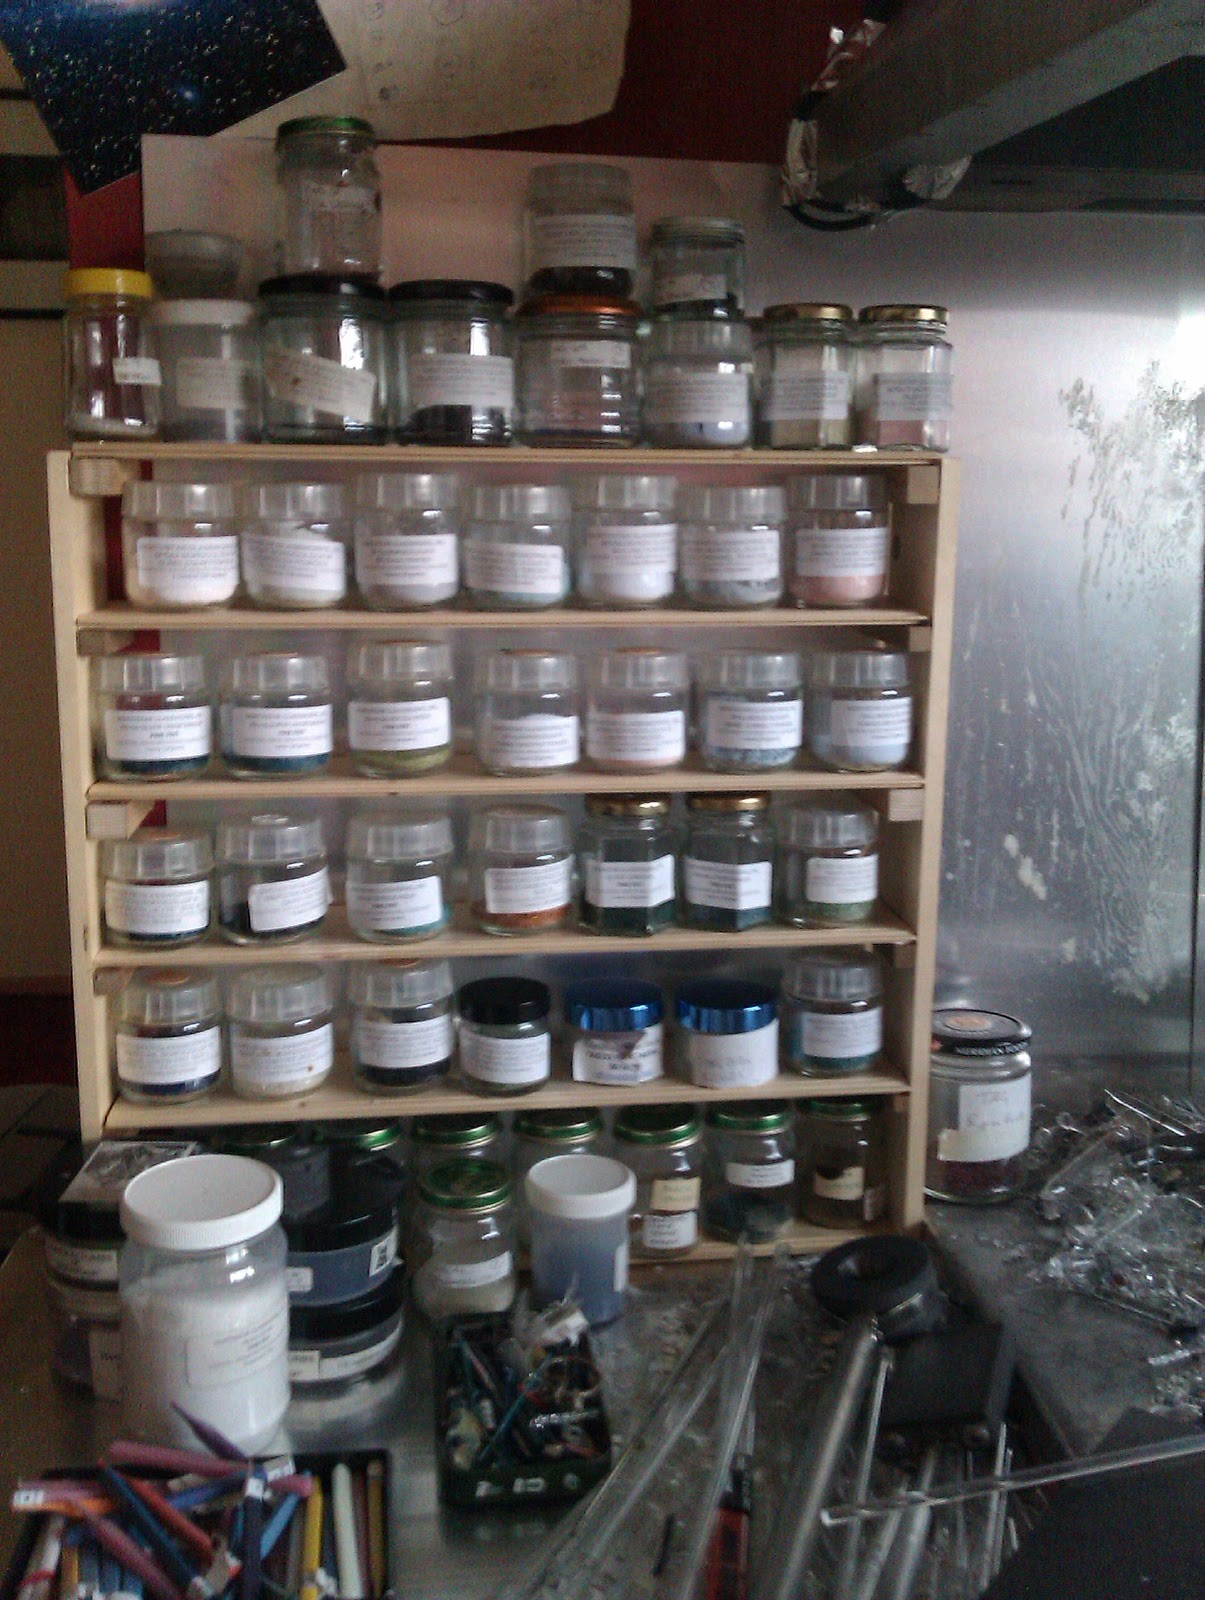
It was pretty exotic stuff, and also needed lots of layers which didn't always play well with each other, I could have a failure rate of 20% some days, added to which it wasn't even the usual borosilicate glass that I use so have to clear the decks to stop cross-contamination of the different glasses. One of the types I used was becoming harder to get hold of, and after waiting a few months got a precious 1/2lb from the American factory that makes it. That's when disaster struck.

I always had a higher than wanted failure rate, but this last batch was terrible! Out of about 50 I think only 3 didn't crack in half before I even got them out of the kiln. Contacting the factory seem to also fall on deaf ears, and later talking to people 'in the know' found out they'd been having problems with this for a while. Even when I did get them to work the colours weren't nearly as good or as reliable, so I decided to start looking around for an alternative.

I made a few back in January of last year, and one or two looked quite interesting. One batch mostly went a boring bloody brown colour, but a few of these were an amazing multi-coloured medley of blues and greens giving them a real Neptune effect. Some stayed a little lighter red and whites to make passable Jupiters too. However time constraints and swapping from Greenwich to Covent Garden didn't give me time to explore them further - until now.

I'm still tweaking the formula, the effects are quite random, but revisiting them I'm getting some lovely colour combos. There is a failure rate, but so far it's around 5-10% which is much better if it says like that. There are the green and blue Neptunes, a few with purple whisps, brown and reds for Mars, and even the odd Jupiter too. Plus it's given me ideas for new glasses to try, one is producing a green-yellow that's quite weird, and even some slightly metallic textures too. As for Saturn, no, not doing that one yet!


Pairing them up is going to be quite a tricky one though, but hopefully I'll have some in the Etsy shop soon, and will be bringing them along to the MCM Expo in Birmingham on 21-22ns March at the NEC.

Thursday, 12 September 2013

Crack in the World

The world cracked from side to side..... and around the middle, across the top, and everywhere else!
The terrible blog title comes from a 1964 sci-fi disaster movie, 'Crack In The World', but in this case it should be millions of cracks as I struggle to get some little world earrings made. Producing them is turning into a disaster movie of their own!

I've been wanting to get some of the glass that makes such lovely cloudy effects for while now, and about six weeks ago I ordered about 3/4lb of this precious glass that hardly anyone seems to stock from a European stockist. And yes, that's in old school pounds weight, as glass producers still use imperial measurements as if they are sweet-shops (which, for anyone who works with glass, they are really!)

So I waited, and waited, and waited a bit more. Without going too much into the sordid details after several weeks, a lack of communication from the supplier (which would have smoothed things considerably) I eventually had to take it to a paypal dispute to get my money back. I got the refund, but not the glass I really needed.

So, now it was an order into an American stockist, which turned out to be super fast. They recommended using DHL for a few extra dollars, and considering the delays I'd already had I figured it was better to have the glass as quickly as possible. The last order I'd had from The States came from USPS (US Postal Service) was still moving around in the USA in the first three days, this delivery was picked up from the USA warehouse at 4pm Wednesday afternoon (their time) and on my door step before noon on Friday! Amazing, even more considering the USA is half a day ahead of us too, so they lost time flying it here!

So, kiln on, 23ct gold leaf ready, and I start making worlds. Or rather, I don't. This batch seemed to be reluctant to make the nice cloudy effects, I made a good 20-30 or so to see how they came out, and switched to another type I had that doesn't always make such nice clouds. I expect a few to crack, normally they are straight in half, and the second batch were mostly fine, but the new glass I'd waited so long for was a disaster! As you can see from the photo's, they have some severe incompatibility cracks, normally caused by mixing two glasses with different expansion rates together (COE) which may be the clear I normally use. It's always been fine in the past, and worked with the other glass fine. I have tried emailing customer service of the factory, but they don't seem interested in answering their emails to tell me if they've had anyone else have problems with this batch.

So this means that little worlds are going to be delayed even longer now, whilst I figure this out, or try to get another brand of glass to perform the same tricks I could get out of this one. I've even been giving serious thought to making my own, it'll probably be quicker to get that way! I am experimenting with some new world designs though, so watch this space.

In the meantime, and on a more positive note, I am now finally getting my Etsy shop refilled. I've been posting on Facebook to let people know, although I've been doing so much I'm worried all my Facebook followers are going to start thinking I'm spamming them! There are lots of new pendants, marbles, a few pens and pins, although earrings may be in short supply for a few more weeks, however when there are they may be some more unusual designs, so keep an eye on my status!


Bah! A days work and loads of gold leaf wasted :-(

Monday, 5 August 2013

100 Pens

You may have been wondering why the lack of new shiny in my Etsy shop, or general lack of new posts on my Facebook page. (Or maybe not!) Well, I've been making pens, lots of pens, lots and lots and lots of them. Endlessly. For weeks. And you can't have any of them!

Sometime last year a visitor at my Greenwich stall asked if I might be able to make some pens for a yearly event, which I'd said 'maybe.' Well a few weeks ago I was commissioned to make 100 pens for 'an event.' I'm not at liberty to say who for or what the event is, but the one main thing is that they all have to be blue, maybe with a little yellow. (And no, this has nothing to do with Doctor who!)

It's come at an ideal time for me, a few months before I start gearing up for Expos in October and November, plus all the craziness that happens at the end of the year! However I have had to put all the other projects and sculptural stuff on hold, as well as not having much time to blog, or make extra things to list on Etsy. Even my Greenwich stall is starting to look a little empty.
A few pens, and still a lot more to make!

In a way it's been quite nice not to have to think too much about what to make next during my days in the workshop. Instead of, 'do I make a pendant, and what sort, or a marble?' it's 'what to make next? Another pen! And then another!' I must admit around numbers 48 to 54 I did start getting a bit fed up of making pens, however once I got into the sixties I got back on a roll again.

They are now nearly finished, and hopefully by the end of this week or start of next week I'll have them all finished and delivered (crossing my fingers and toes that the client likes them!) After that I'll get back to some normality and start making lots of new pendants and marbles for the Etsy shop and the upcoming Expos, hopefully including a few new exciting things too!

Monday, 15 July 2013

Green Man Mask continued

I've taken the annealed mask out of the kiln and started work on adding more leaves and details. So far I've learnt;

Getting quite far along, still needs a few more hours yet
1) I need to think more about my work flow.
     I didn't really expect this first attempt to go so well, and jumped around the sculpture a little too much. This has left some areas under more stress as some leaves pull on others, and when I start heating sometimes this stress has caused parts further away to snap. There was quite a lot of re-joining and tweaking as I went back over areas, even just as I finished one of the first leaves came away that'll need re attaching.
    This time I went a little slower, as I added each new leaf I took time to make sure it was well joined, then while it was still hot (and the new join a little flexible still) joined it anywhere else it was touching the main structure to ensure it has at least two firm hold points, then re-heated the first joins just to make sure. I think 'just to make sure' should be the motto for doing this sort of work!

2) Nice work for hot weather.
      I do really need to get more pendants and big marbles made for the next Expo (yes I know it's months away, but foolishly I did book both London and Birmingham which are only separated by a few weeks). It's not too bad until the afternoon when the sun swings around, and the kiln starts getting hotter. This makes a nice change, and as I only need one wheezy old oxycon and the extractor hood on it makes for quite a quite and chilled out working.

3) Tricky to light, ok once lit
      Talking of old oxycons, it can be a bit tricky to get the mini torch to light and stay lit to start with. It might be because it takes quite a while to get all the air out of the oxygen and propane lines, once it has though it seems (mostly) ok so long as I don't have to turn it back off and on again! This is where a stand would be really helpful, if it allowed it to stay lit when needing both hands free.

4) Tidy that workbench
      Actually, I can't really see that happening, I even get around not needing to tidy it when working 104 glass by putting a board over the top of the debris! A separate little work area, with really, really good light would be ideal though, maybe that's a little higher too.

5) More plaster, less filler
      This poor face cast is starting to look like a bit of a burns victim, or something sort of Evil living-dead-doll from an Asian Horror film! The modroc is charring when the surface gets knocked or flakes off, so a thicker plaster/quartz layer might be better. Maybe also use chicken wire for strengthening instead. I mostly used modroc originally because I happened to have a big unused bag, and it makes quite light casts.
Charred and battered cast

6) Stay calm! Make good support underwear and it can be fixed!
      Hard to do when you heat up one area and another goes 'crack,' but that really probably comes down to the initial problems with not making some of the first joins as well as I should have or putting others under too much stress. Having to go back and re attach them has probably made the whole sculpture stronger and better made though. Next time I'll have to think more carefully about the best way of putting down those first leaves that become the scaffold for the rest of the sculpture.

7) Make more leaves
     This uses a huge amount of leaves, which is ok as I wanted to define the shape just in leaves anyway, but I never seem to make enough. When I've looked at Green Man pictures and original church stone sculptures they make most of the face with very few leaves. Sometimes it's one per face area (i.e. one of each cheek, one for the nose) and then stretch them out to make the shape. I wanted these green faces to be more like you might see them, when in a glimpse out of the corner of your eye the overall shape of the branches and leaves in the trees suggest a face, but then when you look it's gone. Or is that just me?

All in all this has been an interesting project, although it's not finished the next questions are 'do I make another in coloured glass,' and 'do I leave clear or sandblast it to a frosted finish?' And if I did frost it, it then leaves another decision, to then leave it as it is or paint it which leaves a nice matt finish? Mind you, as I don't have an airbrush/sandblaster yet it's probably not really a relevant set of questions!

In other news I might only be at Greenwich this Sunday (or not at all, I'm not sure if I can make it yet) so I am hoping to get some more marbles listed into my Etsy shop this week. As usual I'll give a heads up on Facebook to let you know when I start getting them listed.

Thursday, 11 July 2013

New Toy & Green Man/Woman Sculpture

It's been a bit of catch up since the last Expo and class, mostly I've been getting my head down and making new pendants and marbles for the stall. Hopefully they'll be some new marbles trickling through into my Etsy shop again in the next few weeks as well.

However I still want to try and make time to keep practising and improving my sculptural techniques. For a while I've quite fancied a hand torch, something that can go to really fine pin-point flame to tweak and work on details. Of course I couldn't quite justify the expense, it's not just the torch but all the new pipes and connectors too, plus I couldn't decide which one would be best for me. After chatting about hand torches during the course, and then seeing a cool photo of an American artist standing before a three foot sculpture he was assembling with a hand torch, I looked a little harder and came up with a Smiths Mini Torch at a bargain price.

New Little Torch
Although really made for metal work, it's quite popular with some glass artists. Although the flame really is tiny, it's nice and compact, has a tight hot flame, and best of all comes with it's own light and small hoses already attached. The hoses were the clincher, not only did it save an extra expense of new hoses, I didn't fancy having to hold a torch being dragged down by the normal heavy propane hoses.

Work in Progress, glass leaves being added using a plaster former
It's taken a few weeks now before I've had time to play with it though, apart from playing catch up I'm just confirming a very large commission which will keep me busy for weeks (holding breath and touching wood that it comes off, more on that when it's all confirmed!) However there has been an idea that's been kicking around in my head for a while, and this seemed the ideal tool for the job!

These are some 'work in progress' pictures, of a Green Woman mask that I've been making using the little torch to assemble the leaves which I made using my Lynx torch.
Top view of the mask removed from the former, with a leaf beside it

Off the former, this needs to be annealed before I carry on. One of the 'blank' leaves loose beside it
Little torch with it's tiny flame next to my Lynx running a fairy small flame

Before starting on this I've been wondering how to put the leaves together to make a good 3D shape. I figured a former would be the way to go, but I certainly couldn't afford a custom graphite shape in this size. Bellow is a quick run down on how I put this together, using plaster and mod-roc (basically bandages impregnated with plaster-of-paris, which many model shops stock for making hills and mountains on train sets etc.) For the mould I used the packaging from a paint your own mask kit from my local 99p shop! I was going to use the mask, but the plastic blister pack it came in was ideal as I didn't have to plug up the eyes and mouth cut outs, and it was waterproof!

Mask mould, I left the mask underneath to add some support and strength to the mould
This is my first real go with the torch, and it's quite a liberating way of working, although I could really do with a safe stand where I can leave it when lit if I need both hands free. It's a bit temperamental to light and keep lit until the gases have settled down. I found that I can even use a thin stringer to help 'weld' or 'solder' two parts together, and that if I get really close it's fierce enough to even 'push' the glass. I certainly need a bit more practise with it, maybe once I get time to finish this mask off I'll have a go at another once, with coloured leaves this time. It certainly opens up some interesting ideas and new ways of working.


Bellow is a quick run down of how I made the plaster blank, for anyone who wants to try something similar. Do use the torch on this at your own risk though, this is an experimental technique, and the plaster and modroc WILL get burnt as you work!
 
First layer, I used plaster and quartz (equal parts) which is a formula usually used for making kiln casting moulds. I hoped it would provide better heat tolerance for the 'working area' of the cast

Mod-roc, cut into strips and rough squares. Just pass this through a tray of water to moisten and then slap it on!
After adding some more plaster I started building up the sides with modroc and re-enforcing the main part of the cast with the modroc


Add more plaster before the last has set in the hope it all sticks together well!


Alternating now with layers of plaster and modroc, this adds both lightness and some structural strength


It's really easy to smooth out the modroc with a fingertip, be careful not to get it too damp though

Top up to the top, and smooth over so it will lie flat when de-moulded. It's a working cast and this bit isn't going to be seen so no need to make too much of a fuss of neatness.


Broken chin! I made the quartz/plaster layer a bit too thin, and then didn't push the modroc down enough so had a void under the chin which then flaked off. You learn by mistakes!
The finished cast. Now leave to dry, I left this near (but not on) my kiln for about two weeks to make sure it was fully dried.


Monday, 3 June 2013

I know Kung-Fu - Jennifer Umphress class

There is a bit in 'The Matrix' where Keanu Reeves is plugged in, and they start uploading martial arts information into his brain. When asked how he feels, he just says, 'Woa! I know Kung-Fu!' Well, I sorta know how he feels now.

Jennifer Umphress working on an Octopus
This weekend I went for a short 3 day course at Diana East's lovely studio at the Old Dairy in Narborough. I felt very lucky to be able to get lessons from Jennifer Umphress who produces some really stunning sea life glass sculptures. It's so rare to get a chance to take borosilicate lessons in the UK from someone of her calibre, so the first pleasant surprise was Jessica Landau  had come along too to act as Teaching Assistant! So, combined with it being a really small class, we got really well looked after and the opportunity for some really intense teaching, almost one-to-one on many occasions. We actually discovered that Jennifer normally teaches this course over two weeks, so we really were getting the intense full-on version. Typical that I had a cold that weekend, and a cough that occasionally interrupted my lampworking!

I won't go into full details now, I'm pretty tired, but they were such excellent teachers, and refreshingly open about sharing techniques and skills with us. I'm also not going to post loads of photo's of what I managed to make, as they aren't as good as I know I can do with some more practise. I was really intent on trying to learn as much as possible, I know the real work comes now as I practise, practise, practise all that we covered - and we covered an awful lot!


Turtle
The first day we made some little cute whale sculptures, which had a really tricky fold technique in their tail (literally!) A bit of practise on those and xmas tree decorations, and it was straight in to making turtles and pendants. The next day was jellyfish, which gave me a chance to brush up on my techniques for these and see how I could improve, and then into some 'woooooaaaa' moments as Jennifer demo'ed a huge seahorse sculpture, which was incredibly elegant and stunning - and then it was our turn!
Sea Horse

Quite nerve racking and tricky to do, I'm certainly going to have to practise that one! Luckly Jessica was on hand to help save one from becoming just a melted blob of scrap glass! Jessica then showed us how to make a small pendant size version (it was incredibly tricky and delicate) before one last demo of the day from Jennifer, of a manta ray, which was just open-jaw-stunning!


Manta Ray, the picture doesn't do justice to it!
After a lovely meal with everyone on the course at the local Indian restaurant, (which bizarrely doubles as a hotel where a few of us stayed), I woke on the last day with ideas already buzzing around my head of ways I could use some of the new techniques. We were straight into making huge Angelfish though - I loved making these, they are both chunky and elegant, and have room for some experimenting too.


Jennifer then took some time to talk us through and show how to do some incredibly clever stuff to mount our work, I think I could actually feel my brain filling up at this point! They were both so open at sharing skills and techniques that I've seen used on sculptures that I'd not imagined I'd be able to easily learn, or anyone would be so happy to share. This was some serious glass 'Kung-Fu!' Along with my brain filling up, so was my note book, every page has techniques and snippets of information that was gladly imparted to us. We were desperately running out of time (and oxygen) but there was just enough of both for us to learn how to make little octopus pendants, before the final demo where Jennifer made one of her signature 3D octopuses. Although she said we'd probably not need to see each leg put on as it might be boring for us, none of us moved! It was quite awe-inspiring to see, I did get a few photos but my phone camera was just too slow and shaky.

Taking a hot octopus in hand!

After buying a few colour rods (errr, ok, many rods) we all regrettably said goodbye and headed off. It both flew past, but was so full and inspiring, and it was such a treat to spend so much time with so many fellow UK lampworkers too, and chat about the world of glass. In fact there was so much more that happened and we covered in such a short time that I can't cover in such a short post!

I certainly have a lot to do this week after the expo,  I don't know where some of these new techniques and ideas will take me, but I certainly feel that I've got the confidence to go and now take on so much more - now that I know glass Kung-Fu!

My notebook, this is how many pages I filled during the weekend!


Thursday, 7 March 2013

T-Minus 8 days... and counting...

In a few days I'll temporarily close my Etsy shop (so if you have you're eye on anything please grab it before next Monday!) as we're off to Birmingham for the MCM Comic-con & Memorabilia Expo at the NEC on 16-17th March. This is the first time I've been at this event, so not sure what to expect - appart from the chance to get a really good Balti curry of course!

New test alien lifeform

What is familiar is the impending chaos and worry I haven't got/done/made something, even this quick shot shows how I'm already getting burried under boxes and bits. As it was, I was going to write this blog a few days ago, and not had a chance to until this morning.

Somewhere, I put it down here somewhere....
 Quite a few things have had to go on hold, including inventing new Aliens, however I couldn't resist the chance to show you this little fellow. He needs a little more work, as this was a test piece, then a few more to keep him company and then a nice rock to mount the colony on. I'd imagine he's a sea urchin, the tendrils ontop will have stinging points to catch any unwary alien fish, and grip onto rocks on the shoreline. I have been rather inspired after seeing a post about the Cambrian explosion of life, http://phenomena.nationalgeographic.com/2013/02/18/weird-youth-animal-kingdom/ . This was a weird period when nature threw some very odd creatures together, it seems however strange some of my alien fauna and flora are, nature has got there before me with some really strange strangeness!

Tuesday, 5 February 2013

Plastic and Bullets

I seem to have several projects on the go, the problem often is finding time to finish them or just that last component that will make it work. Embarrassingly, for far too many months gathering dust I have some glass from another artist for a collaboration that have sat in a box in the corner of the workshop/office/studio/storeroom that I seem to live in right now. The problem with that one has been finding two odd bits that will bring it to life, plus some old text books that are buried in the attic. I am sure I will get to it (eventually.)


Crown blank neatly cut out by machine
A newer project that has been rattling around my head for a year or two saw a step closer this week to actually getting out of my head and into the real world. It is going to be a head-dress, or a crown, or something like that - it's still taking shape. I'd could describe it, but I won't, because partly it might spoil the magic of it comeing to life, but mostly because I'm not totally sure how it's going to come together yet.

One key part needed was some old bullet cases, but it's taken until my short New Year break to be able to pop along to a local army surplus store to rummage around for some fired blank shells in various sizes. At the same time I bought some blank tiara/alice bands from a haberdashers which were going to form the base. However once I'd got home I realised they were too thin, too flexiable, and also I'd need to bolt parts onto them at right angles.

Faced with having to cut out a crown shape by hand didn't really fill me with excitement. I was debating between aluminium sheet and acyrlic, both are light, acyrlic was cheaper but I remembered the problems I had last time when cutting through a sheet. I used my trusty electric scrollsaw, very carefully taking my time to saw through so I got a neat straight line. When I finaly got to the end the heat of the blade had just re-welded the plastic together again! So, aluminium it would be.

I was going to order a sheet when on Saturday morning I was setting up at Greenwich and inspiration was setting up a few stalls away in the shape of 'The Shed Laser Co.' who make all sorts of things out of acyrlic! I remember chatting to Sarah who said she could cut anything to order, so I described what I wanted, got a quote, and was sorted!


 Monday afternoon I spent drafting on the PC, then cutting out bits of paper trying to get the shape and sizes right, before emailing Sarah with the design - even down to having the holes so I didn't need to drill them out (and risk cracking the plastic while doing so.) Next Saturday morning I was at Greenwich she gave me the crown base, all neatly cut out! If I'd have done this by hand it wouldn't be anywhere near as neat, I'd have been hot and bothered, broken a few blades, and probably just put off doing it! If you want to do something like this too, and need some plastic 'printed' I know Sarah is in the market most weekends, and you can find 'Theshedlaserco' on facebook too! (I tried to put the link, but for somereason blogger doesn't want to!)

Hopefully there will be more on this head-dress/crown/head-art-installation in forthcoming blogs as i make up some more parts of it.

Monday, 14 January 2013

Sawdust January


Well, as expected, January hasn't gone quite to plan, but then I never really expected it to! The original plan was, tidy and sort out the work-spaces, make lots of stuff, work on some new experimental stuff, and do lots with the huge glass order I placed two weeks before Xmas.
I've managed to find time to make a few new marbles too!

The one big hold at the moment is a big order of coloured borosilicate glass, which left the USA warehouse on the 12th January. By 14th it had got to 'forwarded to exporter,' where it seemed to remain until 2nd, when on-line tracking said 'arrived in UK.' I finally heard today, on month later, it might have actually got through customs and just requires me to pay up for tax and duty before I can git my mitts on it!

In the meantime I have got some small degree of organisation going in the workshop. First on the list was the ever expanding quantity of jars containing frit and powder. I have quite alot of old baby food jars with special lids for plant micro-propagation (long story!)  These are ideal as they are designed to be removed with one hand, so I can easily pop the lid off one that I need to use whilst the other hand is holding a rod of hot glass ready.
Before

What I obviously needed was some kind of spice rack. I'd previously tried a 'lazy Susan' rotating stand to hold them, but it just seemed to take up too much desk room. The result isn't very neat or well made, but it does the job! The before and after photos show how much tidier it looks already!

I didn't realise how much frit I'd acquired, some of them only have a little left, so I'll use those up and start transferring over to all having the same jars. Luckly the commercial small 4oz Northstar jars are about the same height too, as I know I'm going to end up with some more of those too!

After
The slightly bigger job was to sort out rod storage for the incoming 26lb box of glass (yes, I went a little crazy with the ordering, but I figured it would keep me going for quite a while.)  It also became a bigger job as the table that it was going to go under had a strengthening bar that was in the way. In the end I replaced the table completely, it was quite old and rickety. A pack of 40mm plastic pipe chopped up into lengths has made a nice neat 60 storage holes, but I've left space above as I'd like to extend this later on. I probably should have gone for slightly wider tubing, some of the colours may have to take up 2 slots for now, but the 50mm came in dull grey rather than white. At the bottom I've left wider sections to keep the more bulky supplies of tubing.

Apart from this the other major January job has been to get the dust off my Etsy shop. If you check my Facebook page regularly you may have noticed I've gone listing crazy, as I try to get lots of variety and a range of items back into my Etsy shop. I've been aware for a while now how little I manage to list, Greenwich seems to have taken up an awful lot of time and energy this past year, so I'm taking a few weekends off over the quieter months to try and catch myself up in advance - if that makes sense!

Thursday, 27 December 2012

New Fan, New Aches but No Toxic Gases

Well I finally got the new fan installed on boxing day. The original plan was for a day off (I've heard of those) and go out, but it seems it's business as usual when OH got called to work instead, so I figured I might as well use the time productively.

I was going to get a boxed acoustic fan, to keep down some of the noise, and know they are quite popular with many lampworkers, although I wanted something with a bit more power. I'd almost settled on one when I came across some reviews on a hydroponics forum, for which many of these fans are made. The reviews were good, but many of the mentioned a TD-Silent being the best and most reliable they'd come across. Price-wise they seemed pretty good for the money too, the one I wanted only had a 19db level too, so took a deep breath and placed my order.

I didn't quite expect something that looked like it had fallen off a military jet! I didn't get around to taking a picture, so here's a quite You-Tube link for those considering one! TD-Silent video


 The one I got has a massive 200mm intake and outlet, so the first job was stripping out the old fan, which it turns out might have needed a bit of a clean!


Old fan from the original cooker hood
 I've kept and used the switches from the original unit, it wasn't until the new fan turned up that I found it has two speed so needed more switches to control it. At the same time I took out the lights (which were in the wrong place so never used) in the cooker hood and just about anything that might block the airflow.

Straight up and into the outside world for you Mr nasty toxic carbon monoxide!

From there it was time to seal up the sides of the chimney. Originally I'd intended to use a big 200mm pipe I'd bought for the job, but since the old cooker extractor had a nice chimney that was nearly the same size I figured it would do just as well. A quick trim of some spare aluminium sheet, then a little duct tape to seal any gaps and holes and the job was nearly done. Or so I thought! A joist was in the way so everything came down so I could move the whole canopy over just 3 inches!

Shiny! There really is only one exit, but the mirror inside of the chimney makes it look like three!
After another hour or so of clambering around in dark and dirty, and very uncomfortable, spots to get a small bend of flexible tube attached and sealed, the job was really finished. It's not a very tidy or as neat looking as I'd wanted (I went a bit overboard with the duct tape!) and needs a bit of trunking to hide away the leads. It is quiet though, and a quick test with an incense stick showed even on low power it whisked it away with no problems. On high power I barely even saw the smoke leave the incense stick, it was just gone! Not as quiet as I thought, there is quite a rush of noise from the air moving, however when stepping just a few feet away I could hardly hear it, a huge improvement on the low rumble the old one used to generate.

Needs a bit of a clean, but despite the bodging it has nearly doubled the amount of air this old cooker extractor hood can remove
I'd expected it to take two days to get everything in place, so was pleased to get it done, despite the odd set-back, in a day. However today I've woken up with so many aching muscles and bruises I've got hardly anything done, thus getting chance to sit and blog, so maybe my original schedule was right after all!

I still am not sure if I'll be back to Greenwich between now and new year, I am sure I'll get around to a break sometime in the next few weeks if not! I hope you have all head a great Xmas, and may I be the first to wish you all a happy 2013!

Friday, 14 December 2012

Put a chimney on it

I can't believe I've not even got Xmas over with, and I am already planning next year!

Ducting (centre) and one of the pair of Oxycons I use behind (right). Top left is one of the kilns I use.
The last few weeks have been quite busy, and I've still hardly managed to get my Etsy shop up and running again, but, fingers crossed, I hope to start working on that again in the dark days of winter. I am not sure if I will take a few weekends off in January yet, even if I do there won't be any let up as I've signed up for another big sci-fi festival in March!
I am getting used to the bench looking this untidy!

 This time it's Birmingham NEC on 16 &17th March for the joint MCM Expo & Memorabilia festival. If that goes well I'll hope to book for the one later in the year as well, not to forget the two London MCM shows as well! I'm already confirmed for the 24-26th May. Plus of course most weekends at Greenwich, which as you may/maynot have heard is now NOT being redeveloped, instead they are going to repair the roof and fix some of the cobbles to make them a little bit easier to walk and stand on - especially good for those who get to stand there for 9 hours or so!

Amongst all this I also need to do some work on the workshop space. Yesterday I took delivery of a new oxycon (for those who don't know what that is, it's an ex-medical oxygen concentrator that takes oxygen out of the air to help boost the flame I use.) After a few initial problems once I got it up and running I realised just how wheezy the oldest one I use had become, I use two paired together, already I am noticing how much hotter the flame is.

 The other job is also to upgrade the extractor fan as I've never been very happy with how well it works. I already have one part of the new chimney, a 200mm diameter steel pipe and connectors, and  I am just waiting for the fan and final parts. At the same time as installing that I'll take the opportunity to have a bit of a spring clean, put up a few shelves for jars of powered and crushed glass, and maybe even organise some better racking for glass rods.

Somewhere amongst all this I'll be trying to get plenty of new pendants and marbles made for the Expos, Etsy shop and Greenwich stall, plus I have a few sculpture projects I've been wanting to find time to have a go at. They say there is no rest for the wicked, but I certainly don't remember ever being so wicked to have earnt so much to do!

Monday, 15 October 2012

When I grow up, I want to be a Mad Scientist

Blue Lobster-Octopus thing.....
As I try to get ready for the next big sci-fi Expo, with one eye on getting ready for xmas too, panic is setting in that I'm not making enough. So as I work later, the music is getting louder and faster! Amongst this I'm playing alot of 'Rob Zombie' and many of the songs have lots of sound dubs from old horror films, all of which takes me back to when I was young, and was allowed to stay up on Friday or Saturday nights to watch horror films - of which I thought at the time the Hammer horrors were the best!

This also reminded me of the great school playground debate of  'what do you want to be when you grow up?' I thought I wanted to be a scientist, but part of me knew that still wasn't quite right.

Different angle of 'Blue Thing'
Modern scientists wear white coats, work in big bright clean laboratories, and work in big teams on complex little bits of science written up in learned publications no-one can understand. I couldn't quite put my finger on it at the time, but I knew that wasn't the type of scientist that I wanted to be. I wanted to be more like my hero's at the time; Peter Cushing or one of the 50's black and white scientists dashing around in the dead of night. I wanted to be the sort of scientist that works in a tweed waistcoat and cravat, whose laboratory is a dark dusty basement of a castle, whose colleague is called 'Igor' and helps dig up supplies from the graveyard next door, and communicates discoveries by wildly shouting 'It's alive! It's aliiiiivvvee!!!!' Yes, I wanted to be a mad scientist.
Body parts or the blue lobster before being grafted onto the body


seroastrumare duotripodes, which means 'two legged star-seaweed' all mounted up ready to go to the Expo
Of course most people don't then grow up to be firemen, policemen etc, and certainly not to be a mad Victorian scientist, and so I went and did more (mostly) sensible things. I guess this is what drew me originally to the SteamPunk genre, but it's only now that I am starting to really fulfil my childhood ambitions of creating insane creatures.


A new Red Star Spiral
 
 I do indeed have frock coat, cravat, waistcoat etc, but tend not to wear them whilst working as they are rather hot to work in! However if I was in a draughty farmhouse, castle, lighthouse, windmill etc, then it might well be worth me taking that up as work attire. Of course, what I really lack right now, is an abandoned castle/lighthouse/farmhouse/windmill to continue my experiments creating life from glass, re-creating creatures that may have swum alien seas or ancient Martian canals.


Queue mad laughter.... a sneak preview of some new limbs I have made for an even larger, even madder creation...
 
So, if you have a property that matches this description, ideally in Suffolk or North Essex, and it's at a very, very, very low rent, then I'd be delighted to hear from you! Of course if it's not too close to any villages with pitchfork totting locals who could rally into a lynch mob that would be even better.....


Isolated lighthouse at Orford Ness, an ideal location?